
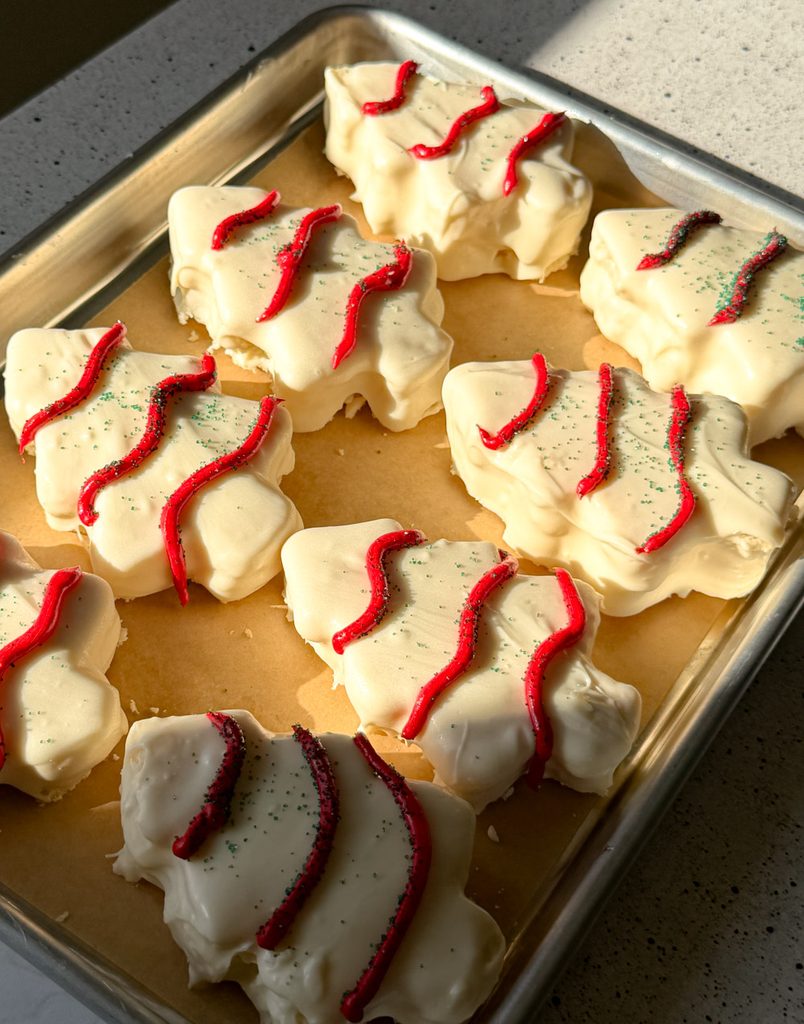
Homemade Little Debbie Christmas Tree Cakes are a fluffy vanilla sheet cake with a marshmallow buttercream filling, dipped in a crisp white chocolate shell and finished with a red zigzag and green sprinkles. They are the snack aisle classic you grew up on, made from scratch and frankly a lot better.
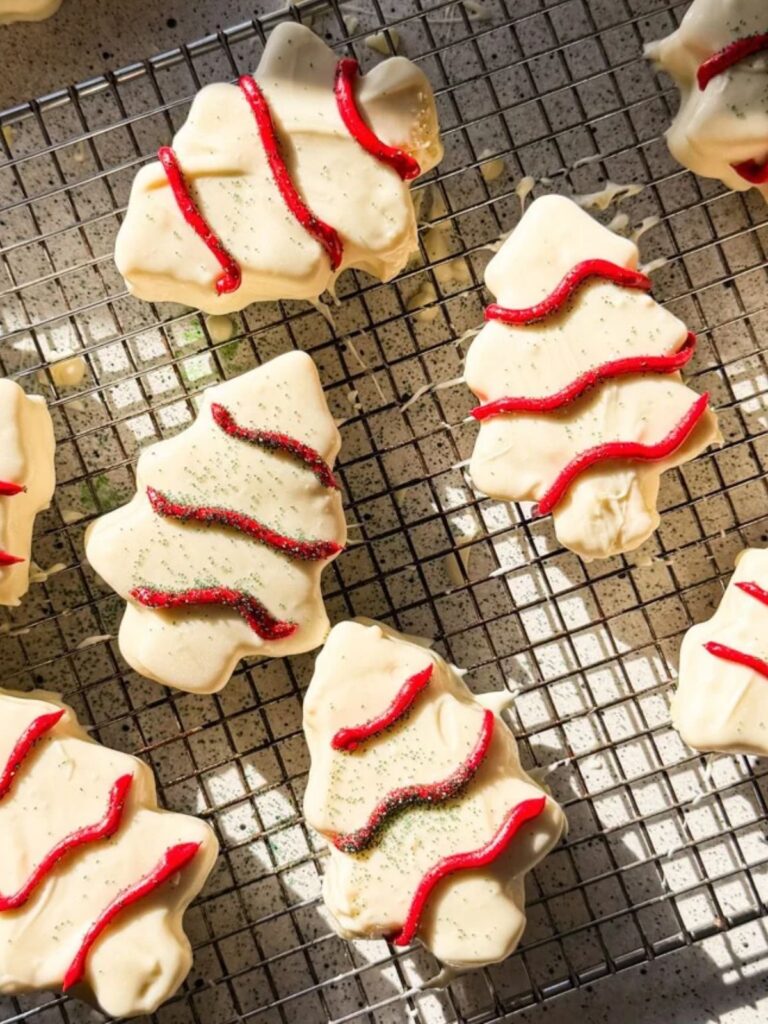
Every year those little cellophane-wrapped trees show up in stores and I buy a box out of pure nostalgia. This year I did a side-by-side taste test with my homemade Little Debbie Christmas Tree Cakes, and the store-bought ones left a weird waxy film in my mouth. Mine did not. The cake is soft and buttery thanks to sour cream and buttermilk, the filling actually tastes like marshmallow, and the shell snaps instead of smearing. Same shape, same zigzag, no mystery film.
If you are building out a holiday baking list, these Little Debbie Christmas Tree Cakes sit nicely next to my Festive Gingerbread Crinkle Cookies and Salted Caramel Gingerbread Cake With Buttercream. And if you need something for a dinner party that looks like you tried very hard, my Pear Cheesecake With Ginger Spiced Crust has you covered.
Why You'll Love Homemade Little Debbie Christmas Tree Cakes
- Better than the box. Real butter, real vanilla, and no film coating the roof of your mouth. I checked.
- One sheet pan, no layers. You bake one thin cake, chill it, and cut out trees. No stacking, no leveling, no crumb coat.
- They make a lot. One 18 x 13 inch pan gives you about 20 trees, which is enough for a cookie swap, a classroom, or one very committed household.
- Kid-friendly decorating. The red zigzag and sprinkles are the perfect job for small helpers who want to feel important.
- Make-ahead friendly. They keep for a week in the fridge and a month in the freezer, so you can get holiday baking done early and act casual about it later.
Ingredient Overview
Here is a quick look at what goes into these Little Debbie Christmas Tree Cakes. Exact amounts are in the recipe card at the bottom of the post.
- Cake flour: This is what makes the sponge soft and tender like the original. Spoon and level it so the cake does not turn dense.
- Butter, sugar, and vegetable oil: Butter brings flavor, and a little oil keeps the cake moist even after it has been chilled.
- Whole eggs plus egg whites: The extra whites keep the crumb light and the color pale, which is the classic snack cake look.
- Sour cream and buttermilk: Both add moisture and a slight tang that keeps the cake from tasting flat. Have them at room temperature.
- Baking powder and salt: Lift and balance. Do not skip the salt.
- Marshmallow fluff: The base of the filling, beaten with butter, powdered sugar, vanilla, a pinch of salt, and a splash of heavy cream.
- Red gel food coloring: Tints a small portion of the filling for the zigzag on top.
- White chocolate or almond bark: For the shell. Almond bark sets firmer and is very forgiving. White candy melts work too.
- Coconut oil: Thins the melted coating so it dips smooth and sets with a clean finish. Any neutral oil works.
- Green sprinkles or sanding sugar: The finishing touch that makes them look like the real thing.
How to Make Homemade Little Debbie Christmas Tree Cakes
Full instructions for these Little Debbie Christmas Tree Cakes are in the recipe card below, but here is the quick version.
- Bake the cake: Cream the butter, oil, and sugar, beat in the eggs, sour cream, and vanilla, then alternate the dry ingredients with buttermilk. Bake in an 18 x 13 inch pan at 350°F for 35 to 40 minutes and cool completely.
- Make the filling: Beat butter and marshmallow fluff, add powdered sugar, then vanilla, cream, and salt. Tint a little red for the zigzag.
- Cut and fill: Chill the cake, cut out about 20 trees, slice each in half, and pipe filling between the layers.
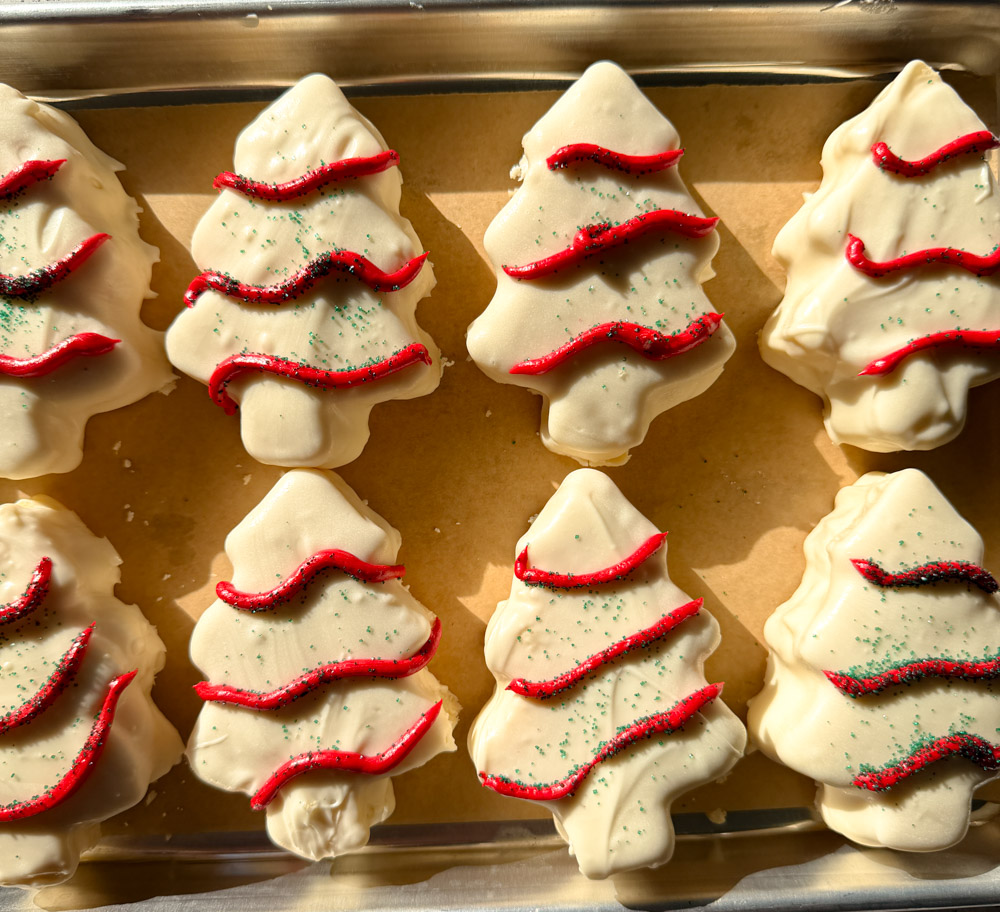
- Dip and decorate: Dip in melted white chocolate, let it set, then add a red zigzag and green sprinkles.
Common Mistakes
- Cutting warm cake. A room temperature sheet cake tears and crumbles under a cookie cutter. Chill it first, even 15 minutes helps.
- Cold ingredients. Cold eggs, sour cream, or buttermilk will make the batter seize and bake up uneven. Set everything out an hour ahead.
- Overmixing after the flour. Mix just until combined or the cake gets tough instead of spongy.
- Overfilling. Too much filling and the top half slides off when you dip. Pipe a thin, even layer to the edges.
- Chocolate that is too thick. If the coating is gloppy, the trees end up wearing a parka. Add a little more coconut oil and keep it warm.
- Sprinkling too late. Pipe the zigzag and add sprinkles immediately, before the frosting crusts over.
Tips and Tricks
- Freeze for 10 minutes before slicing. A slightly firm tree is much easier to cut in half evenly with a serrated knife.
- Use the scraps. The cake left between cutouts makes great cake pops or a trifle layer. Or just eat it standing at the counter.
- Keep the coating warm. Set the bowl over a pan of warm water while you dip so it stays fluid for all 20 trees.
- Dip, lift, tap. Use a fork to lift each tree out and tap it on the side of the bowl a few times for a thin, even shell.
- Use a thin tip for the zigzag. Cut a very small hole in the red piping bag so the lines look like the original and not like a crime scene.
- Final chill. Refrigerate the finished trees for 10 minutes so the filling and shell fully set before you stack or wrap them.
Recommended Tools
- 18 x 13 inch sheet pan: The right size for a thin, even layer. A smaller pan makes the cake too thick to dip.
- Stand mixer or hand mixer: For the batter and the filling.
- Christmas tree cookie cutter: This is the exact one I used.
- Serrated knife: For slicing each tree in half without squishing it.
- Piping bags: Two of them, one for the filling and one for the red zigzag.
- Large heatproof bowl and a fork: For melting and dipping.
- Parchment paper: For lining the pan and setting the dipped trees.
- Offset spatula: For spreading the batter and moving the trees around.
FAQ - Homemade Little Debbie Christmas Tree Cakes
Here are the questions I get most! If yours is not here, leave it in the comments at the bottom of the post.
- Can I make these gluten-free? Yes. Swap the cake flour for a 1:1 gluten-free baking flour, and check your white chocolate or almond bark label for gluten.
- Can I use a boxed cake mix? Yes. A white or yellow mix baked in the same 18 x 13 inch pan works when you are short on time. Pick up at the filling step.
- Why is my white chocolate clumping? It got too hot or a drop of water got in. Melt it in short 20 second bursts, stir in the coconut oil, and keep it over warm water while dipping.
- My filling is too thick or too thin. What do I do? Too thick, add heavy cream a teaspoon at a time. Too thin, add a little more powdered sugar.
- Can I use a different coating? Milk or dark chocolate both work, and colored candy melts are fun for other holidays.
- Can I change the flavor? A little almond extract in the cake or filling is a nice holiday twist.
- How many trees does this make? About 20, depending on the size of your cutter.
Storing and Freezing
To store: Keep your homemade Little Debbie Christmas Tree Cakes in an airtight container in the fridge for up to 1 week, with parchment between layers so the zigzags stay pretty. Let them sit out for about 15 minutes before serving for the softest cake.
To freeze: Freeze the finished trees in a single layer until firm, then move them to a freezer bag or container for up to 1 month. Thaw in the fridge overnight and they taste just like day one.
FOR MORE RECIPES YOU SHOULD BAKE FOR CHRISTMAS
Remember LEAVE A 5 STAR EVIEW AND A COMMENT if you love the recipe or any questions. Follow me on Instagram, Pinterest, and TikTok. I post so many fun things on all platforms! Happy baking!
Recipe
Homemade Little Debbies Tree
Ingredients
For the Cake
- 1 cup unsalted butter room temperature
- 1¾ cup granulated sugar
- 2 tablespoons vegetable oil
- 3 large eggs room temperature
- 2 large eggs whites room temperature
- ⅓ cup sour cream room temperature
- 1 Tablespoon pure vanilla extract
- 3 cups cake flour spoon and leveled
- 1 Tablespoon baking powder
- 1 teaspoon salt
- 1¼ cups buttermilk room temperature
For the marshmallow filling
- ½ cup softened unsalted butter
- 1 cup marshmallow fluff
- 3 cups powder sugar
- 1 teaspoon pure vanilla extract
- 2 tablespoons milk or cream preferably heavy cream
- ¼ teaspoon salt
For the white chocolate coating
- 24 ounces white chocolate or almond bark
- 4 tablespoons coconut oil or non flavored oil
For the topping
- red food dye
- green sprinkles
Instructions
FOR THE CAKE
- Preheat your oven to 350°F. Spray an 18 x 13-inch metal cookie pan with cooking spray, line with parchment paper, and spray again. Set aside.
- In a medium size bowl, add the cake flour, salt, and baking powder. set aside3 cups cake flour spoon and leveled, 1 Tablespoon baking powder, 1 teaspoon salt
- In the bowl of a stand mixer fitted with the paddle attachment, cream the butter, oil, and sugar on medium speed until fluffy and smooth, about 3 minutes. Scrape the bottom and sides of the bowl with a rubber spatula.1 cup unsalted butter room temperature, 1¾ cup granulated sugar, 2 tablespoons vegetable oil
- Start adding the egg whites and whole eggs, one at a time, beating on medium speed after each addition for about 30 seconds. Scrape the bowl after each addition. Once all the eggs are added, beat for 30 more seconds.3 large eggs room temperature, 2 large eggs whites room temperature
- Add the sour cream and vanilla extract. Beat on medium-low speed for 1 minute. If the mixture looks clumpy, don't worry; it will smooth out once the flour mixture is added.⅓ cup sour cream room temperature, 1 Tablespoon pure vanilla extract
- On low speed, add ⅓ of the flour mixture and ½ of the buttermilk to the butter mixture, mixing until almost incorporated. Add another ⅓ of the flour and the remaining buttermilk, mixing just until a few streaks of flour remain. Add the final ⅓ of the flour mixture and mix just until combined.1¼ cups buttermilk room temperature
- Scrape the bottom and sides of the bowl to ensure everything is evenly mixed.
- Pour the batter into the prepared pan and bake for 35-40 minutes, or until a toothpick comes out with just a few moist crumbs and the top is golden brown. Let the cake cool completely in the pan.
For the Marshmallow Filling
- In a large mixing bowl, beat the softened butter with an electric mixer on medium speed until smooth and creamy, about 2 minutes.½ cup softened unsalted butter
- Add the marshmallow fluff to the bowl and mix until fully combined, scraping down the sides as needed.1 cup marshmallow fluff
- Gradually add the powdered sugar, 1 cup at a time, mixing on low speed until incorporated. After all the powdered sugar is added, increase the mixer speed to medium-high and beat until light and fluffy, about 2-3 minutes.3 cups powder sugar
- Add the vanilla extract, heavy cream, and salt, mixing until just combined. Scoop out about ¼ cup of the filling, tint with red food coloring, and place in a piping bag. Place the remaining filling in a separate piping bag with a small hole cut. Set aside.1 teaspoon pure vanilla extract, 2 tablespoons milk or cream, ¼ teaspoon salt, red food dye
Assembly
- Once the cake has cooled, place it in the fridge or freezer to firm up for easier cutting while you get the chocolate melted.
- In a large, heatproof bowl, microwave the white chocolate or almond bark in 20-second intervals, stirring between each interval, until fully melted. Stir in the coconut oil until smooth and fully incorporated. Tip: Keep the white chocolate mixture in a warm spot while dipping, or place it over a warm water bath to maintain a smooth consistency.24 ounces white chocolate or almond bark, 4 tablespoons coconut oil or non flavored oil
- Use a tree-shaped cookie cutter to cut the chilled cake into 20 tree shapes (or as many as your cutter allows).
- Carefully slice each tree horizontally with a serrated knife.
- Pipe the marshmallow filling onto one half of each tree, piping all the way to the edges. Place the second half on top, gently pressing to secure.
- When ready to dip, take a tree and dip it into the melted white chocolate, using a fork to lift it out and place it on parchment paper. Let the chocolate harden before piping the red frosting.
- Using the red frosting, pipe a zigzag design at an angle over each tree and add green sprinkles. Serve and enjoy!green sprinkles
Meagen says
I’m giving this recipe a 5 because it tastes good and the instructions were easy to follow BUT I highly recommend using much less or no coconut oil because it is all me and my taste testers could taste. Luckily I only did this with half and the other with just melted white chocolate in a double boiler and they were MUCH better. I love coconut but not in these babies! Will use again minus the oil!
Em says
What size marshmallow fluff jar??
Molly Murphy says
7 ounce!
Anonymous says
Could I refrigerate this batter to pre-prep and use the next day or would it ruin?
Molly Murphy says
I wouldn’t refrigerate the batter, but you can definitely bake the cake and leave it right in the pan. Just cover it tightly with plastic wrap and cut out the trees the next day! I do that all the time!
Ashley Campbell says
These came out so delicious! They are very time consuming to make but worth it! I did only use half the amount of powder sugar for the filling and I think it's delicious. I also like others stated didn't use any coco butter in the white chocolate and they came out perfect!
Brittany says
These came out amazing! I didn’t use coconut oil and they were perfect! Thanks so much!