
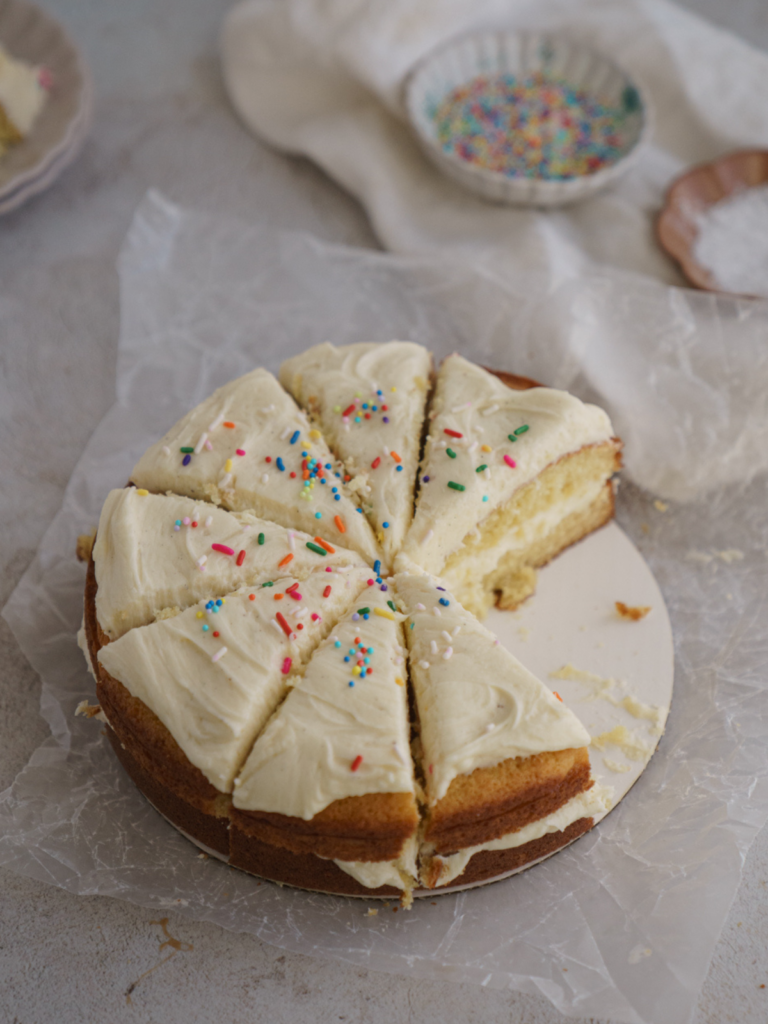
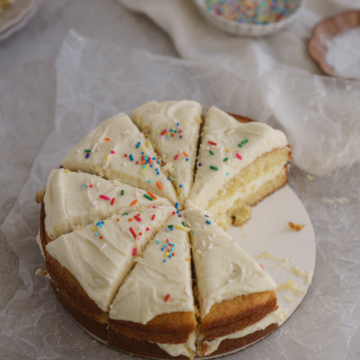
Vanilla Bean Cake - Tender cake vanilla bean cake layers that are moist and soft, with creamy and velvety vanilla bean cream cheese buttercream!
This vanilla bean cake is the ultimate treat for when you're craving something simple yet elegant. And the best part? It's a one-pan wonder! That's right-no need to rummage through your kitchen cabinets for multiple cake pans or deal with a stack of layers. This cake is all about simplicity, without sacrificing flavor or texture. It's tender, moist, and packed with warm vanilla flavor thanks to the magic of vanilla bean paste. Whether you're celebrating a special occasion or just need a sweet treat to brighten your day, this cake is here for you. Bonus: a scoop of ice cream on the side takes it to the next level!
For more recipes like this, here are some of my favorite!
- The Best Snack Size Strawberry Coconut Cake
- Easy To Make Mini Snickerdoodle Cake Recipe
- Super Easy and Fluffy Cake Like Cornbread Recipe
Why You'll Love This Vanilla Bean Cake
- One-pan: This cake is baked in a single 8-inch round pan, making it perfect for anyone who doesn't want to fuss with multiple cake pans or deal with tricky stacking.
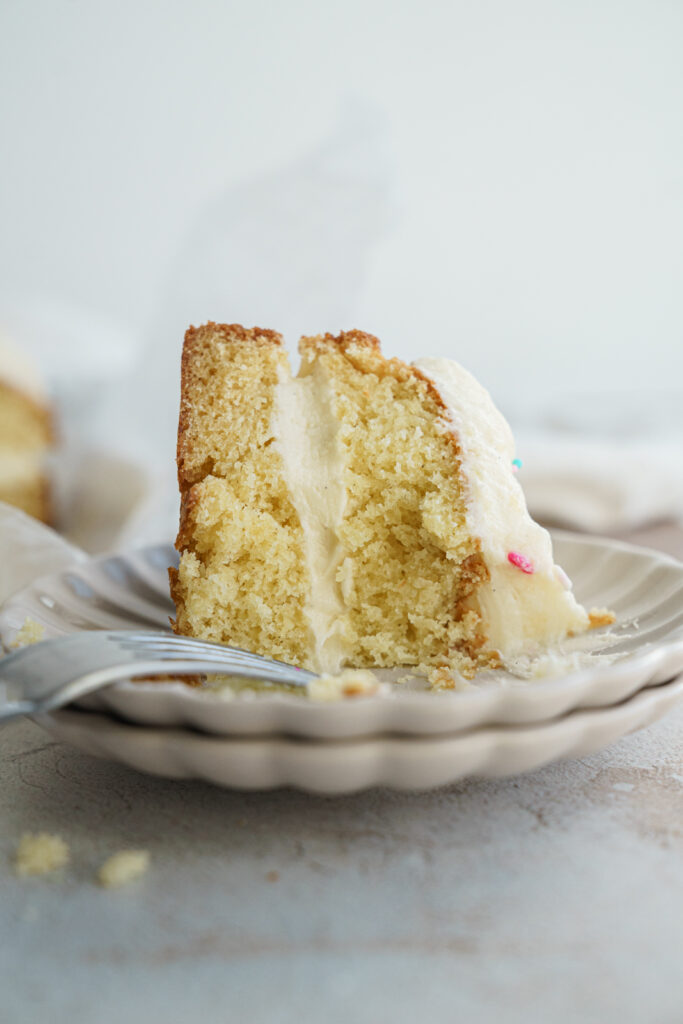
- Tender and moist: Thanks to sour cream and buttermilk, this cake has the perfect texture-soft, tender, and just melts in your mouth.
- Best vanilla flavor: Vanilla bean paste adds gorgeous vanilla bean seeds and bold flavor that makes this cake feel extra special.
- Versatile for any occasion: Birthday? Check. Fancy dinner party? Yep. Just because? Always. This cake works for every scenario.
- Customizable frosting options: Pair it with vanilla bean buttercream for a classic taste, you can also add tiny bit of red food coloring and it make it pink!
Ingredients (and Some Handy Tips!)
For the Cake
- Unsalted butter: Room temperature is a must here! Soft butter will cream better with the sugar, creating a fluffy, tender cake batter.
- Granulated sugar: The sweetness here helps balance the tanginess from the sour cream and buttermilk.
- Vegetable oil: A little bit of oil keeps the cake moist and tender, so don't skip it!
- Large eggs: Room temperature eggs mix better into the batter and help create the perfect texture.
- Vanilla bean paste: This is the star of the show! My favorite brand is this one, and it's worth every penny. You'll love seeing those little vanilla bean seeds in every bite!
- Vanilla extract: A splash of pure vanilla extract deepens the flavor, making this the best vanilla cake.
- Sour cream: Tangy, creamy, and oh-so-important for keeping this cake moist. Bring it to room temp for best results.
- Cake flour: Cake flour is finer than regular flour and gives the cake that melt-in-your-mouth texture. If you don't have it, check out the FAQs for an easy swap!
- Baking powder and baking soda: These leavening agents work together to give the cake its rise.
- Salt: A pinch goes a long way in enhancing all the flavors.
- Buttermilk: The buttermilk adds a subtle tang and richness to the batter. Make sure it's at room temp-it makes a difference!
For the Cream Cheese Frosting
- Unsalted butter: Softened butter ensures a smooth, creamy frosting.
- Cream cheese: Full-fat cream cheese makes the frosting rich and tangy-no shortcuts here!
- Powdered sugar: Sifted powdered sugar ensures a lump-free frosting.
- Heavy cream: A little splash adds lightness and makes the frosting extra fluffy.
- Vanilla bean paste: Adding this to the frosting ties it perfectly to the cake, making it a cohesive dessert.
Step-by-Step Instructions
For the vanilla bean cake,
- Preheat your oven to 325°F and let it heat for at least 30 minutes. This gives the oven time to stabilize at the correct temperature. A preheated oven ensures your cake bakes evenly without overbrowning the edges.
- Grease an 8-inch round cake pan and line the bottom with parchment paper. Spray the parchment for good measure-no one wants a cake stuck to the pan!
- In a large mixing bowl, or in the bowl of a stand mixer fitted with the paddle attachment, cream the butter and sugar together on medium speed until it's light and fluffy. This takes about 2-3 minutes. Don't forget to scrape down the sides of the bowl with a rubber spatula.
- Add the vegetable oil and mix until combined. Then, add the eggs one at a time, beating well after each addition. Scrape down the sides and bottom of the bowl after each egg-you'll thank me later when your batter is silky smooth!
- Mix in the vanilla bean paste, vanilla extract, and sour cream. If the batter looks a little curdled, don't worry-it'll smooth out once the dry ingredients are added.
- In a medium bowl, whisk together the cake flour, baking powder, baking soda, and salt.
- With the mixer on low speed, alternate adding the dry ingredients and buttermilk to the wet ingredients. Start with half the dry ingredients, followed by half the buttermilk. Repeat until everything is just combined. Scrape down the sides of the bowl to ensure no flour mixture is hiding at the bottom.
- Pour the batter into the prepared pan and smooth the top with a small offset spatula to remove any air bubbles.
Baking!
- Bake in the preheated oven for 35-40 minutes, or until a toothpick inserted into the center of the cake comes out with moist crumbs. Keep an eye on it-every oven is different, and you don't want to overbake.
- Let the cake cool in the pan for 10 minutes, then carefully transfer it to a wire rack to cool completely. Cooling will take about 40 minutes. Be patient-frosting a warm cake is a no-go!
For the Frosting
- In a large mixing bowl, beat the butter and cream cheese together on medium speed until smooth and creamy, about 2 minutes. Scrape down the sides and bottom of the bowl as needed.
- Gradually add the powdered sugar, one cup at a time, mixing on low speed until combined. Once all the sugar is in, add the heavy cream and vanilla bean paste. Beat on medium-high speed for 2-3 minutes until the frosting is light, fluffy, and ready to slather on your cake.
Tips and Tricks - vanilla bean cake
- Preheat for 30 minutes: Always preheat your oven for at least 30 minutes to ensure it's at the proper temperature. This helps your cake bake evenly without hot spots or overcooked edges.
- Room temperature ingredients: Make sure your butter, eggs, sour cream, and buttermilk are all at room temperature. This makes mixing easier and helps the batter come together smoothly.
- Use parchment paper: Lining the bottom of your pan is insurance against a stuck cake. Parchment is your best friend!
- Don't overmix: Stir the batter until just combined. Overmixing activates the gluten in the flour, which can make your cake dense.
- Cool completely before frosting: Frosting a warm cake will melt your frosting and make a mess. Give the cake plenty of time to cool on a wire rack before assembling.
FAQs
Can I use regular flour instead of cake flour?
Yes! If you don't have cake flour, measure out 1 cup of all-purpose flour, remove 2 tablespoons, and replace them with cornstarch. Sift it together for best results.
Can I make this as a sheet cake?
Definitely! Pour the batter into a 9x13-inch pan and bake for about 30-35 minutes.
Can I freeze these vanilla bean cake?
Yes! Wrap the unfrosted cake layers tightly in a double layer of plastic wrap, then store in the freezer for up to 3 months.
Recommended Tools
- 8-inch round cake pan: My go-to is Fat Daddio's pans (affiliate link). They're light-colored, which helps the cake bake evenly without overbrowning.
- Parchment paper: A roll of this stuff is a baker's best friend.
- Cake leveler: If you don't trust yourself with a knife, a cake leveler will give you perfect, even layers every time.
- Stand mixer: A stand mixer with a paddle attachment makes the creaming process a breeze. If you don't have one, a hand mixer works too!
- Small offset spatula: This is perfect for smoothing batter or frosting the cake.
Storing Your Vanilla Bean Cake
Once your cake is frosted and assembled, store it in an airtight container to keep it fresh. If you don't have a cake container, you can lightly wrap the cake with plastic wrap, but be careful not to smudge the frosting. Refrigerate the cake to keep it from drying out or melting, especially if your kitchen is warm. When you're ready to serve, let the cake sit at room temperature for about 30 minutes to allow the frosting to soften and the flavors to shine.
For slices, you can store them individually by placing each piece in a small airtight container or wrapping them tightly with plastic wrap. This makes it super easy to grab a slice whenever the craving hits! The cake will stay fresh in the fridge for up to 3 days, but trust me-it probably won't last that long.
Freezing Your Vanilla Bean Cake
If you want to freeze this vanilla bean cake, it's best to do so before frosting. Wrap the completely cooled cake tightly in a double layer of plastic wrap and then in aluminum foil to prevent freezer burn. Label it with the date so you don't forget how long it's been in there. The cake can be frozen for up to 3 months, and when you're ready to use it, simply thaw it overnight in the refrigerator.
If your cake is already frosted, you can still freeze it! Place the entire cake in the freezer uncovered for about an hour, or until the frosting is firm. Then, wrap the cake tightly in plastic wrap and foil. To serve, thaw it in the fridge overnight, and then let it come to room temperature for about an hour before slicing. Whether frosted or plain, freezing is a great way to make your cake ahead of time for special occasions or those moments when you need a quick dessert.
- Roasted Strawberry Crumble Cheesecake Recipe
- Caramel Spice Cake With Salted Caramel Frosting
- NYC Crispy, Thin and Gooey Cookie Recipe
If you loved this Vanilla Bean Cake Recipe don't forget to leave a 5-star rating and a comment! I'd love to hear your feedback or answer any questions you have! Follow me on Instagram, Pinterest, and TikTok. I post so many fun things on all platforms.
Recipe
Vanilla Bean Cake
Ingredients
For the cake
- ½ cup unsalted butter room temperature
- ¾ cups granulated sugar
- 1 tablespoon vegetable oil
- 3 large eggs room temperature
- 1 teaspoon vanilla bean paste can sub vanilla extract
- 1 teaspoon pure vanilla extract
- 3 tablespoons sour cream room temperature
- 1 ½ cups cake flour
- 1 ½ teaspoon baking powder
- ½ teaspoon baking soda
- ¾ teaspoon salt
- ½ cup buttermilk room temperature
Cream Cheese Frosting
- 1 cup unsalted butter room temp
- 4 ounces cream cheese room temperature
- 3 cups powder sugar
- 1 tablespoon heavy cream
- 1 teaspoon vanilla bean paste
Instructions
For the Cake
- Preheat your oven to 325°F. Prepare an 8-inch round cake pan by greasing it with butter or nonstick cooking spray. Line the bottom of the pan with parchment paper to ensure the cake releases easily after baking. Spray the bottom again for extra assurance and set aside.
- In a large mixing bowl, or in a stand mixer fitted with the paddle attachment, beat the room-temperature butter and granulated sugar on medium speed until light and fluffy. This should take about 2-3 minutes. Scrape down the sides and bottom of the bowl with a rubber spatula to ensure everything is evenly mixed.½ cup unsalted butter room temperature, ¾ cups granulated sugar, 1 tablespoon vegetable oil
- Add the eggs, one at a time, mixing well after each addition. Be sure to scrape the bowl after adding each egg to ensure even mixing. Once all the eggs are incorporated, mix in the vanilla bean paste, vanilla extract, and sour cream. Beat until the mixture is smooth and well-combined. If the mixture looks slightly curdled, don't worry-it will smooth out when you add the flour.3 large eggs room temperature, 1 teaspoon vanilla bean paste, 1 teaspoon pure vanilla extract, 3 tablespoons sour cream room temperature
- In a medium-sized bowl, whisk together the cake flour, baking powder, baking soda, and salt.1 ½ cups cake flour, 1 ½ teaspoon baking powder, ½ teaspoon baking soda, ¾ teaspoon salt
- With the mixer on low speed, add half of the dry ingredients to the wet mixture, followed by half of the buttermilk. Mix just until combined. Repeat with the remaining flour mixture and buttermilk. Mix until the batter is smooth and no lumps remain, being careful not to overmix. Scrape down the sides and bottom of the bowl to ensure everything is fully incorporated.½ cup buttermilk room temperature
- Pour the batter into the prepared cake pan and use the back of a spoon or a mini offset spatula to smooth the top evenly.
- Bake the cake in the preheated oven for 35-40 minutes, or until a toothpick inserted into the center of the cake comes out clean. If your oven runs hot, start checking for doneness around 30 minutes to prevent overbaking.
- Once baked, remove the cake from the oven and let it cool in the pan for 10 minutes. Carefully turn the cake out onto a wire rack and let it cool completely, which will take about 40 minutes. Ensure the cake is fully cooled before frosting to prevent the frosting from melting.
For the Cream Cheese Frosting
- While the cake cools, prepare the frosting. In a large mixing bowl, beat the room-temperature butter and cream cheese together on medium speed until smooth and creamy, about 2 minutes. Scrape down the sides and bottom of the bowl to ensure an even texture.1 cup unsalted butter, 4 ounces cream cheese
- Gradually add the powdered sugar, one cup at a time, mixing on low speed after each addition to avoid a sugar cloud. Once all the powdered sugar is added, mix in the heavy cream and vanilla bean paste and a pinch of salt. Increase the mixer speed to medium-high and beat the frosting for 2-3 minutes until light and fluffy.3 cups powder sugar, 1 tablespoon heavy cream, 1 teaspoon vanilla bean paste
Assembling the Cake
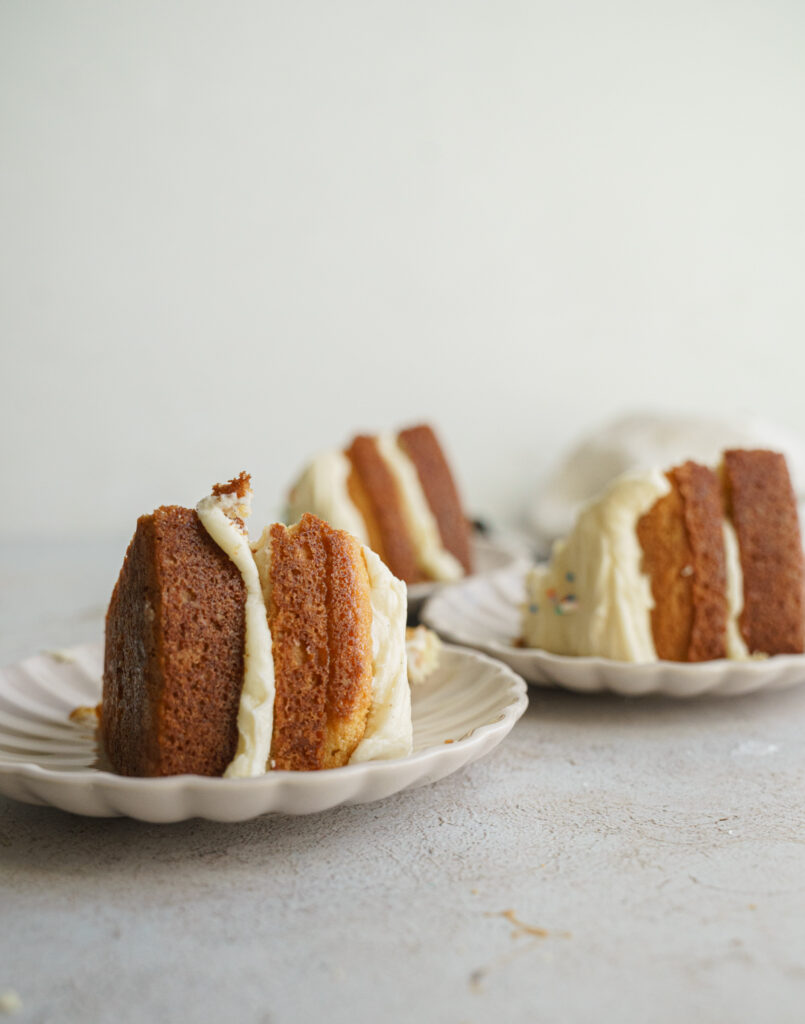
- Once the cake is completely cool, use a serrated knife to slice the single layer horizontally into two even layers. Place the bottom layer on your serving plate or cake stand.
- Spread half of the frosting over the bottom layer using an offset spatula or butter knife to create an even layer of frosting. Gently place the top cake layer on top of the frosted layer.
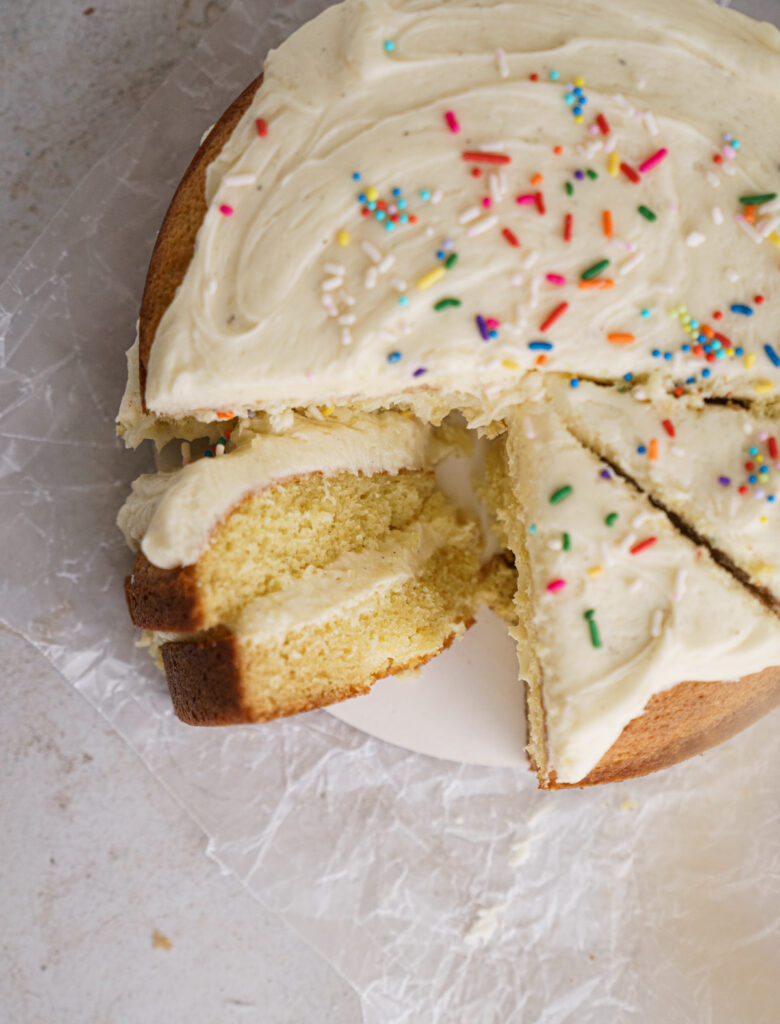
- Spread the remaining frosting evenly over the top of the cake, leaving the sides unfrosted for a rustic, minimalist look. For a festive touch, add rainbow sprinkles or fruit on top.
- Slice the cake into pieces and serve. Store leftovers in an airtight container in the refrigerator for up to 3 days. Allow the cake to come to room temperature before serving for the best flavor and texture. Enjoy!
Marie-France Le Blanc says
Hi! I’m planning on baking my cakes this weekend to freeze for the following weekend for a gender reveal. Your recipe looks delicious! Do u think it would freeze well? Thanks!
Marie-France
Marie-France Le Blanc says
Hi! I’m planning on baking my cakes this weekend to freeze for the following weekend for a gender reveal. Your recipe looks delicious! Do u think it would freeze well? Thanks!
Marie-France
Molly Murphy says
yes! you can freeze the entire cake frosted, or just freeze the cake itself. make sure it’s tight in plastic wrap!
Jenna says
I made this cake for my birthday last week and my husband said it was the best cake he’s ever had. Great recipe!!
Anonymous says
Thank you for sharing this recipe
Taylor says
Delicious recipe! I baked it as a cake and everyone loved it! Now, I’m using this recipe for cupcakes, what time would you suggest?
Molly Murphy says
18-22 minutes!!!