
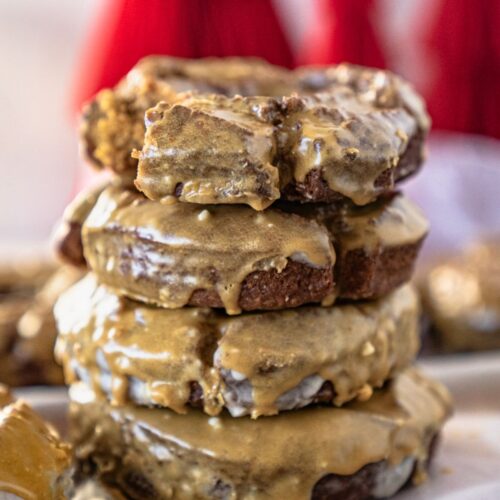
These Buttermilk Old Fashioned Donut are crispy, crackly, and glazed to perfection. This homemade donut recipe delivers bakery-style texture and flavor with simple ingredients and step-by-step tips for best results.
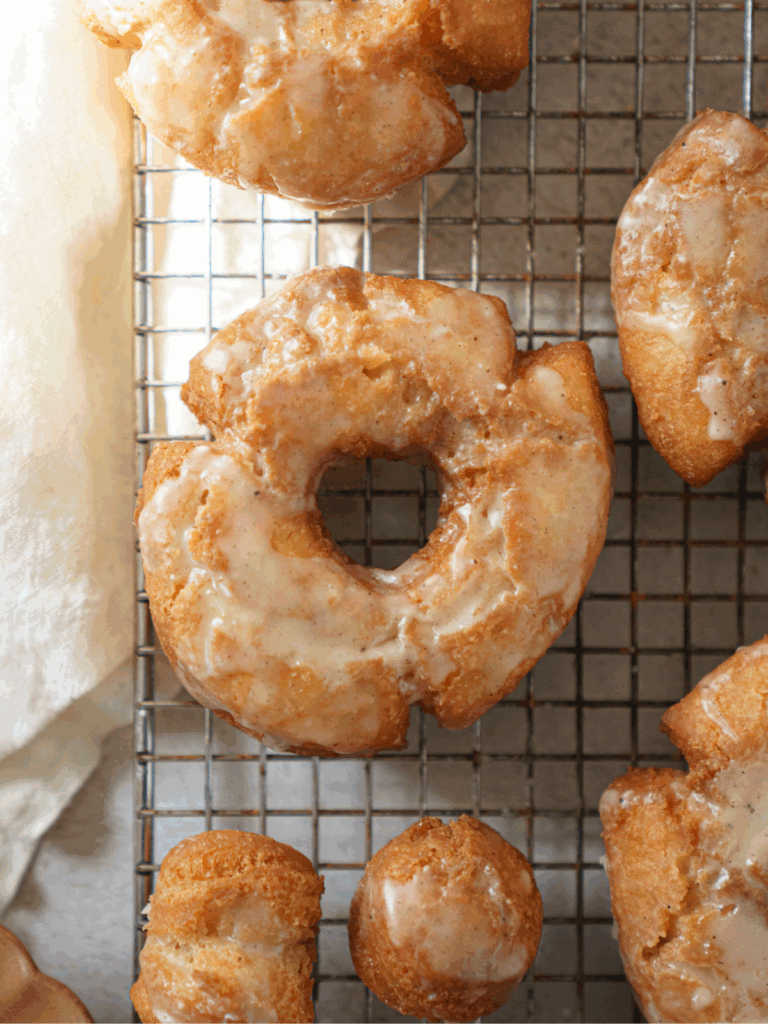
These Buttermilk Old Fashioned Donut are rich, crackly, and completely irresistible. Made with simple ingredients and fried until golden brown, they're the kind of cake donut you'd expect to find at a donut shop, but even better when made fresh at home. This perfect recipe was born from a whole lot of testing and a serious craving for a bakery-style old-fashioned donut. I wanted that signature craggy crust, a tender crumb on the inside, and a vanilla glaze that drips into every crevice. After adjusting the wet ingredients, mixing with a paddle attachment, and perfecting the oil temperature, this is the version that finally nailed it.
- Old Fashion Blueberry Donut Bundt Cake
- Fried Banana Caramel Donut Recipe
- Summer's Best Blueberry Crisp Cake
- Carrot Cake Brioche Donuts Recipe, Fried
- Best Brioche Donut Recipe, Homemade!
Why You'll Love This Buttermilk Old Fashioned Donut Recipe
These donuts are everything you want in a homemade cake donut.
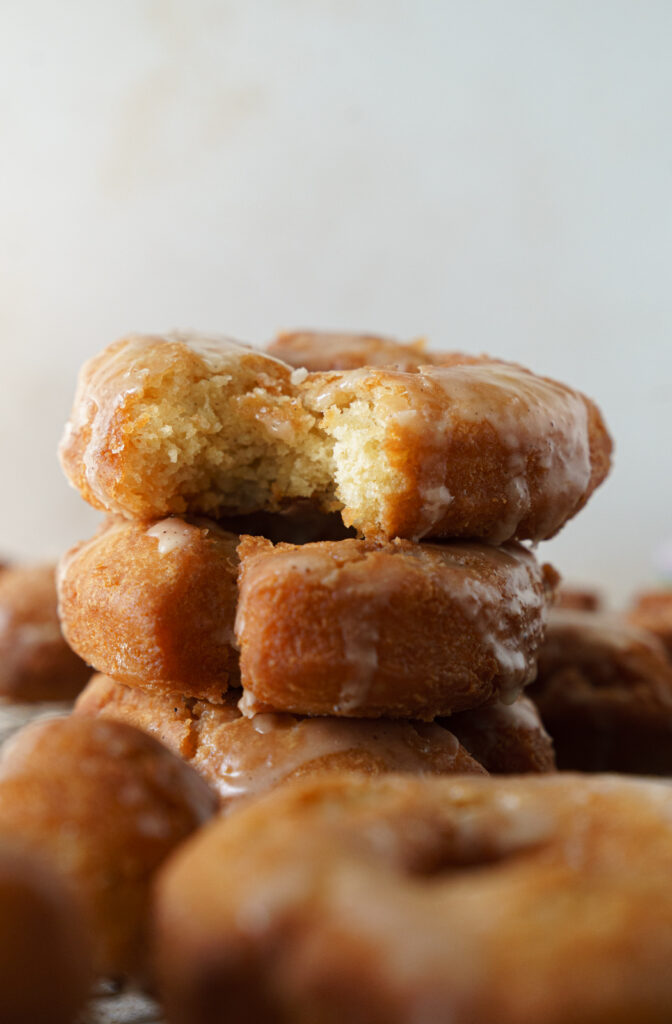
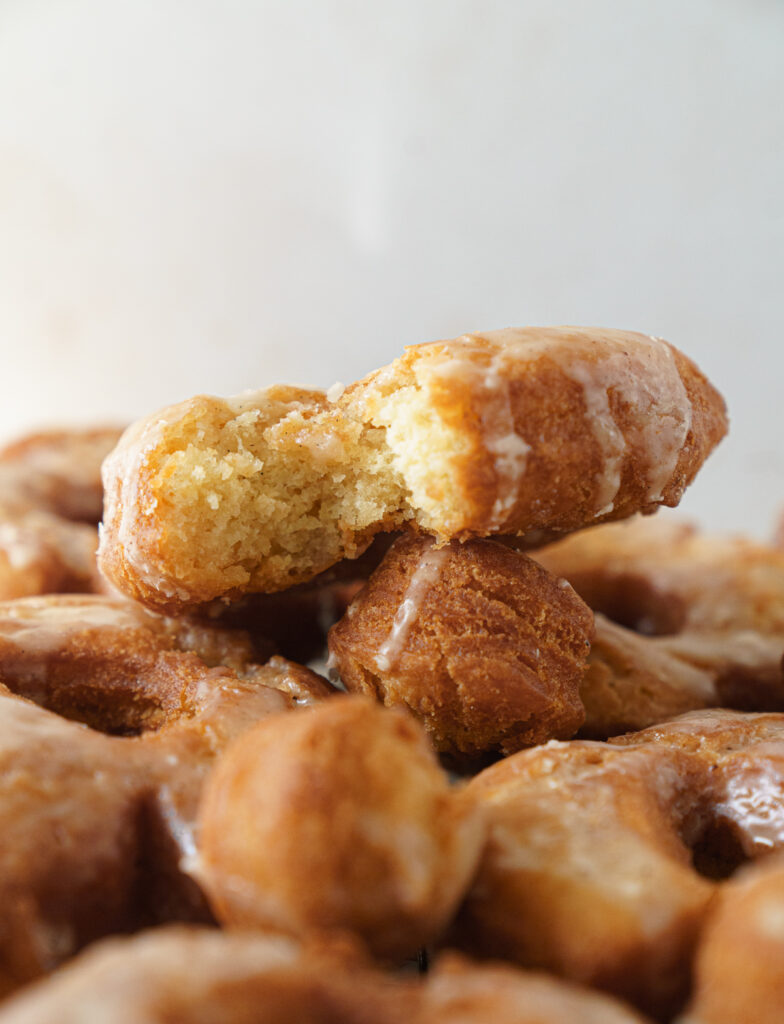
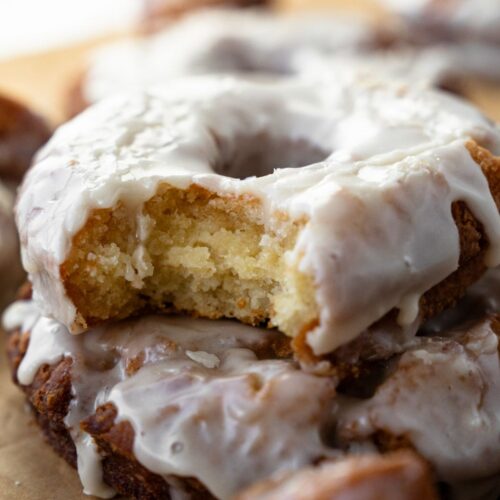
- Craggy, crisp edges and a soft, cakey center
- Real buttermilk and sour cream for rich flavor and a tender texture
- Easy-to-follow doughnut recipe made with simple ingredients
- No donut pan needed-just a rolling pin and a donut cutter
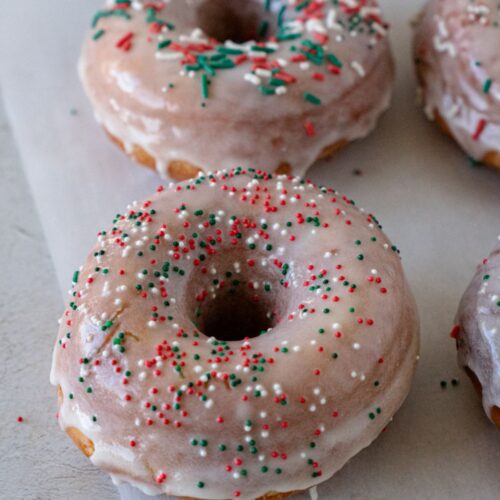
- A sweet glaze that melts perfectly into every ridge
Ingredients You'll Need
Here's a quick breakdown of what makes these old-fashioned buttermilk doughnuts so good.
- Butter (room temperature): Gives your dough richness and flavor.
- Granulated sugar + brown sugar: A mix of both keeps the sweetness balanced and helps the donuts brown.
- Egg yolks + whole egg: Egg yolks contribute to the tender crumb, while the whole egg adds structure.
- Sour cream: Adds moisture and acidity for the best texture.
- Vanilla extract: Classic flavor that rounds everything out.
- Baking powder: Your leavening for rise and crag.
- Milk powder: Deepens the flavor and helps with golden brown coloring.
- Salt: Just enough to balance the sweet glaze.
- All-purpose flour: The best flour for this cake donut-no need for cake flour here.
- Buttermilk: Essential for the old fashioned buttermilk donuts flavor.
Don't have buttermilk? Here's how to make your own:
You can make a quick buttermilk substitute at home using two pantry staples. While it's not quite the same as full-fat store-bought buttermilk, it works great in a pinch-especially in this doughnut recipe.
To make ½ cup buttermilk:
- Add 1½ teaspoons white vinegar or lemon juice to a liquid measuring cup
- Fill with whole milk until you reach the ½ cup line
- Stir and let sit for 5-10 minutes until slightly curdled
This DIY version adds enough acidity to activate the baking powder and still gives you that rich, tangy flavor in your old fashioned buttermilk donuts.
Step-by-Step Instructions
Follow these steps for best results. The process is simple, but chilling the dough and scoring it before frying makes all the difference in getting that donut shop texture.
Make the dough:
- In a large mixing bowl (or the bowl of a stand mixer fitted with the paddle attachment), beat the softened butter, granulated sugar, and brown sugar together on medium speed until light, fluffy, and creamy-about 2-3 minutes. Scrape down the sides and bottom of the bowl as needed.
- Add in the egg yolks, whole egg, and vanilla extract. Beat until fully combined. The mixture may look slightly separated or curdled-totally fine. Add the sour cream and mix on low just until combined.
Mix the dry ingredients:
- In a medium bowl, whisk together the all-purpose flour, baking powder, milk powder, and salt until well distributed. This dry mixture ensures even lift and that signature cakey donut bite.
Combine and chill:
- With the mixer on low speed, add the flour mixture and the buttermilk. Mix just until a dough starts to come together-do not overmix. The sticky dough will be soft, thick, and slightly tacky.
- Turn the dough out onto a well-floured surface. Gently knead it once or twice to bring it together, then shape it into a flat disc about 1-1½ inches thick. Cover the bowl with plastic wrap and refrigerate for at least 1 hour, or up to overnight.
Cut and score the donuts:
- On a lightly floured work surface, roll out the chilled dough to about ½ inch to ⅝ inch thickness. Use a floured doughnut cutter to cut out as many donuts as possible, then gently reroll the scraps and continue cutting.
- Use a sharp paring knife to cut three small vertical slits evenly spaced around the outer edge of each donut. Then score a shallow incision around the inner ring (where the doughnut holes were cut). This gives them that old-fashioned donut crack when frying.
Chill again:
- Place the cut donuts on a parchment-lined baking sheet, cover with plastic wrap, and chill for another 20-30 minutes. This second chill helps with structure and frying shape.
Fry until golden:
- In a large Dutch oven or heavy-bottomed pot, heat at least 2 inches of vegetable oil to 325-350°F. Use a candy thermometer to monitor the oil temperature closely.
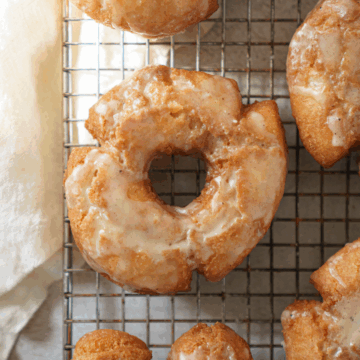
- Fry the donuts in batches (2-3 at a time) for 90 seconds to 2 minutes per side, or until golden brown and cracked. Use a slotted spoon or fish spatula to flip. Transfer each donut to a wire rack lined with paper towels to drain.
Vanilla Glaze for Old-Fashioned Donuts
This vanilla glaze is simple, sweet, and made to seep into every crag.
- In a medium bowl, whisk together 3½ cups powdered sugar, ¼ cup water, and 1 tablespoon vanilla extract until smooth. Add more water a teaspoon at a time if needed.
- Instead of dipping, try pouring the glaze over each donut while they're still warm. This helps it fill the cracks and sets beautifully.
- Let excess glaze drip onto a cooling rack with parchment underneath.

Tips for Best Results
A few key things make a big difference with this buttermilk donut recipe:
- Keep the dough cold-chilling twice is the secret to holding the donut shape.
- Cut thick! Roll your dough at least ½ inch thick.
- Score every donut-this is what gives it that classic crackled look.
- Watch your oil temperature-if it drops too low, the oil cools and makes greasy donuts.
- Pour the glaze for perfect coverage in all those crevices.
FAQs About Buttermilk Old Fashioned Donut
- Can I make the dough ahead of time?
Yes! You can make the dough the night before and let it chill overnight in an airtight container or wrapped tightly in plastic wrap. - Do I need a donut cutter?
Yes-you'll get the cleanest results with a real doughnut cutter (or two round cookie cutters). A bench scraper is also helpful for handling the dough. - Can I bake these in a donut pan?
This is a true fried cake donut-it won't be the same baked. If you're after that old fashioned glazed buttermilk donut texture, frying in hot oil is essential. - Can I use cake flour?
Stick to all-purpose flour for this one. Cake flour will make the texture too soft and won't hold the donut shape as well.
Recommended Tools
- Doughnut cutter or biscuit cutter (for donuts + doughnut holes)
- Large Dutch oven or kitchen deep fryer
- Candy thermometer (to monitor oil temperature)
- Slotted spoon or fish spatula
- Wire rack + paper towels
- Rolling pin
- Bench scraper
- Parchment paper or silicone baking sheet
How to Store and Freeze
These are best fresh, but here's how to store your homemade doughnuts:
- Store cooled, unglazed donuts in an airtight container at room temperature for up to 2 days.
- Freeze unglazed donuts in a freezer bag for up to 1 month. Reheat and glaze the next morning.
- Avoid storing glazed donuts stacked-they'll stick! Use a piece of parchment paper in between.

These Buttermilk Old Fashioned Donut are the ultimate sweet treat perfect for a brunch spread or any time you want something sweet! If you try this recipe, leave a star rating and let me know how it turned out in the comments. Happy baking!
- Blueberry Muffin Cheesecake With Crumble Topping
- The Best Blueberry Buckle Cake
- Caramel Gooey Butter Cake With Caramel Sauce
Don't forget to save this recipe card and share it! I'd love to hear your feedback or answer any questions you have! Follow me on Instagram, Pinterest, and TikTok. I post so many fun things on all platforms.
Recipe
Buttermilk Old Fashioned Donut
Ingredients
- ½ cup butter softened to the touch
- ½ cup granulated sugar
- ¼ cup brown sugar packed
- 2 large egg yolks cold
- 1 large whole egg
- 1 teaspoon pure vanilla extract
- 3 tablespoon sour cream
- 2 teaspoons baking powder
- 2 tablespoon milk powder
- 1 teaspoon salt
- 3 ½ cups all purpose flour
- ½ cup whole buttermilk* see note for homemade
For the glaze
- 3 ½ cups powdered sugar sifted if lumpy
- ¼ cup water plus more as needed
- 1 tablespoon vanilla extract
Instructions
- In a large mixing bowl (or the bowl of your stand mixer fitted with the paddle attachment), beat the softened butter, granulated sugar, and brown sugar together on medium speed until light, fluffy, and creamy-about 2-3 minutes. Scrape down the sides and bottom of the bowl as needed.½ cup butter softened to the touch, ½ cup granulated sugar, ¼ cup brown sugar packed
- Add in the egg yolks, whole egg, and vanilla extract. Beat until fully combined. The mixture may look slightly separated or curdled-totally fine. Add the sour cream and mix on low just until combined.2 large egg yolks, 1 large whole egg, 1 teaspoon pure vanilla extract, 3 tablespoon sour cream
- In a separate medium bowl, whisk together the all-purpose flour, baking powder, milk powder, and salt until well distributed. This step ensures the leavening is evenly incorporated and prevents any clumps in the dough.2 teaspoons baking powder, 2 tablespoon milk powder, 1 teaspoon salt, 3 ½ cups all purpose flour
- With the mixer on low speed, add the dry ingredients and the buttermilk. Mix just until a dough starts to come together-do not overmix. The dough will be soft, thick, and slightly tacky.½ cup whole buttermilk*
- Turn the dough out onto a lightly floured surface. Gently knead it once or twice to bring it together, then shape it into a flat disc about 1-1½ inches thick. Wrap in plastic wrap and refrigerate for at least 1 hour, or up to overnight.
- On a lightly floured surface, roll out the chilled dough to about ½ inch to ⅝ inch thickness. Use a floured donut cutter to cut out as many donuts as possible, then gently reroll the scraps and continue cutting. You want the donuts to be thick enough to hold their shape and get a tender, cakey middle.
- Once your donuts are cut, use a sharp paring knife to cut three small vertical slits evenly spaced around the outer edge of each donut. Then, using the tip of your knife, make a shallow incision around the inner ring (where the donut hole was cut), just scoring the surface. This creates those signature craggy ridges and deep cracks as they fry, like the kind you'd see at a real donut shop.
- Place the cut donuts onto a parchment-lined baking sheet, cover loosely with plastic wrap, and refrigerate for another 20-30 minutes. This second chill helps the donuts keep their shape during frying and promotes those signature crackly rings.
- Fill a heavy-bottomed pot or deep fryer with at least 2 inches of oil (vegetable or canola). Heat the oil to 325-350 F and maintain that temperature. Use a thermometer-this part is crucial. Too hot, and the donuts will get too dark and dry; too cool, and they'll absorb too much oil.
- Working in small batches (2-3 at a time), gently lower the chilled donuts into the hot oil. Fry for 90 to 2 minutes per side, or until deeply golden and cracked. They may flip on their own-if not, gently turn them with a slotted spoon or spider. Keep the oil temperature steady between batches.
- Use a slotted spoon to lift the donuts out of the oil and transfer them to a wire rack set over a baking sheet. Let them cool for about 5-10 minutes before glazing.
- In a medium bowl, whisk together the powdered sugar, water, and vanilla extract until smooth. If the glaze feels too thick, add more water a teaspoon at a time until it's pourable but still coats the donut.3 ½ cups powdered sugar, ¼ cup water, 1 tablespoon vanilla extract
- Instead of dipping, try pouring the glaze over each donut while they're still warm. This helps the glaze run into every crack and crevice and gives you that glossy, professional finish. Let the glaze set for about 10 minutes before serving.
Notes
- Add 1½ teaspoons white vinegar or lemon juice to a liquid measuring cup
- Fill with whole milk until you reach the ½ cup line
- Stir and let sit for 5-10 minutes until slightly curdled. the longer you let it sit, the better it is! Sometimes I let mine sit in the fridge overnight!
Rexann Nielsen says
These donuts are fun to make & everyone loved them❤️ Thank you for your good directions
YOU ARE AMAZING !
Dana Eynon says
Made these donuts and they came out perfectly! Easy to follow and loved by all.
Susan Brown says
10/10 recipe.
Chelci says
The whole family loved these! AND they were made by my 12 year old! Amazing recipe!!
Lesli says
Making these this weekend finally! Just looking at your photo they taste amazing!
Mona says
This is the most delicious donut recipe ever! I’ve made it multiple times now and people need to know how amazing it is. Thank you!