
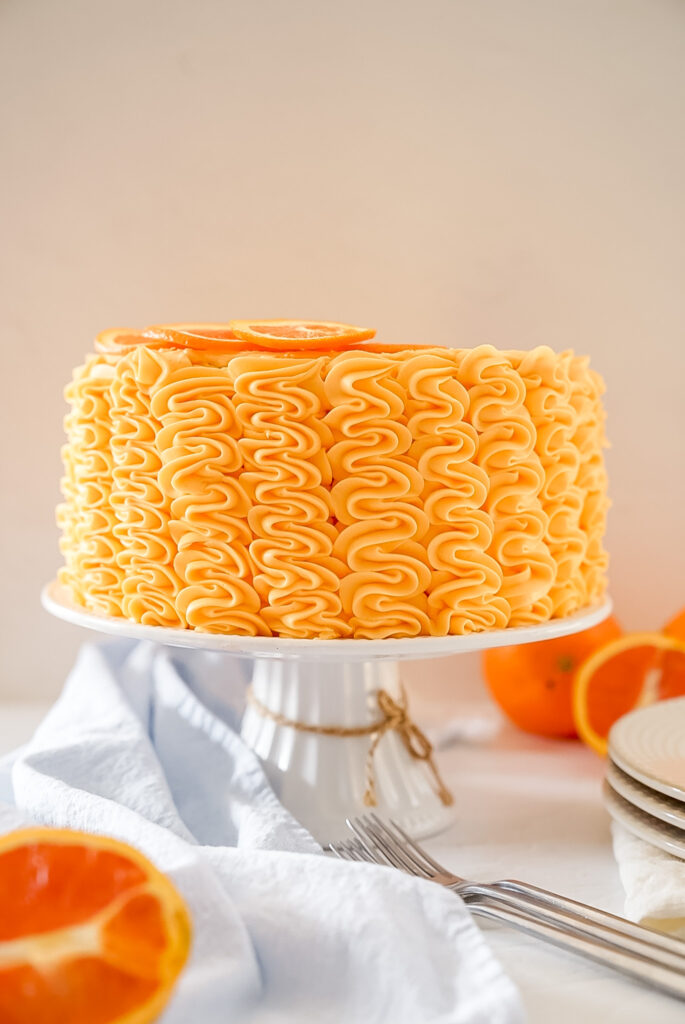
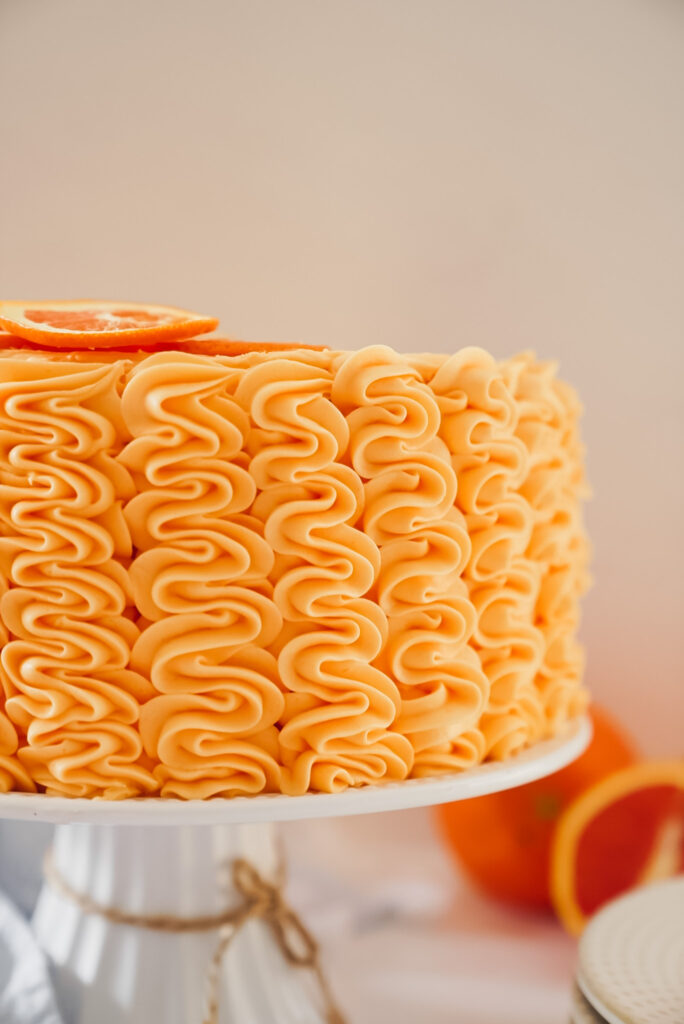
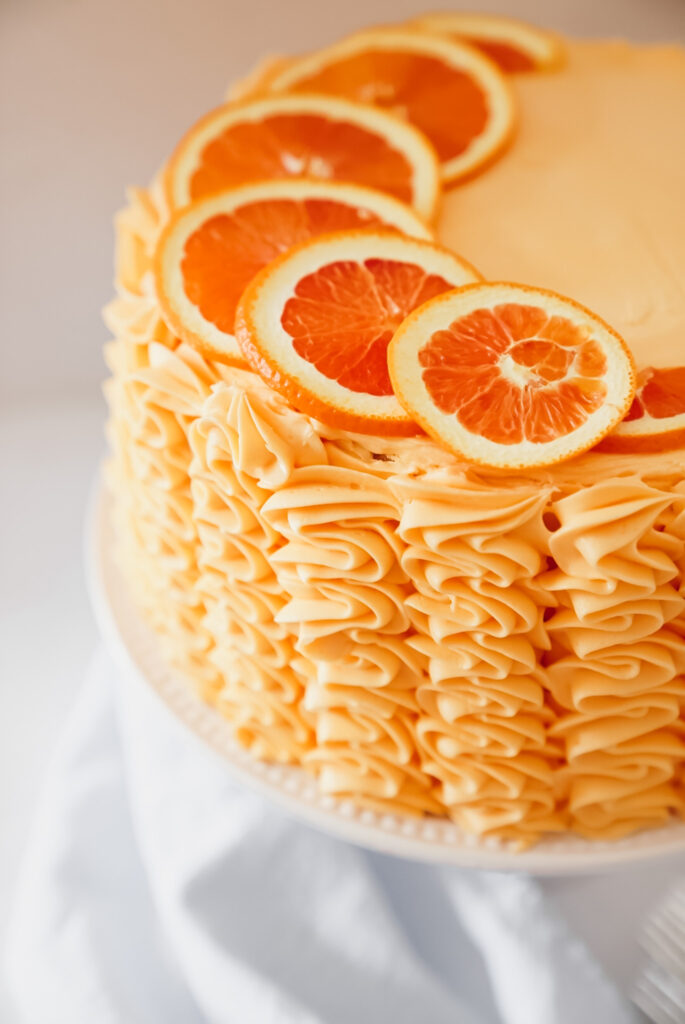
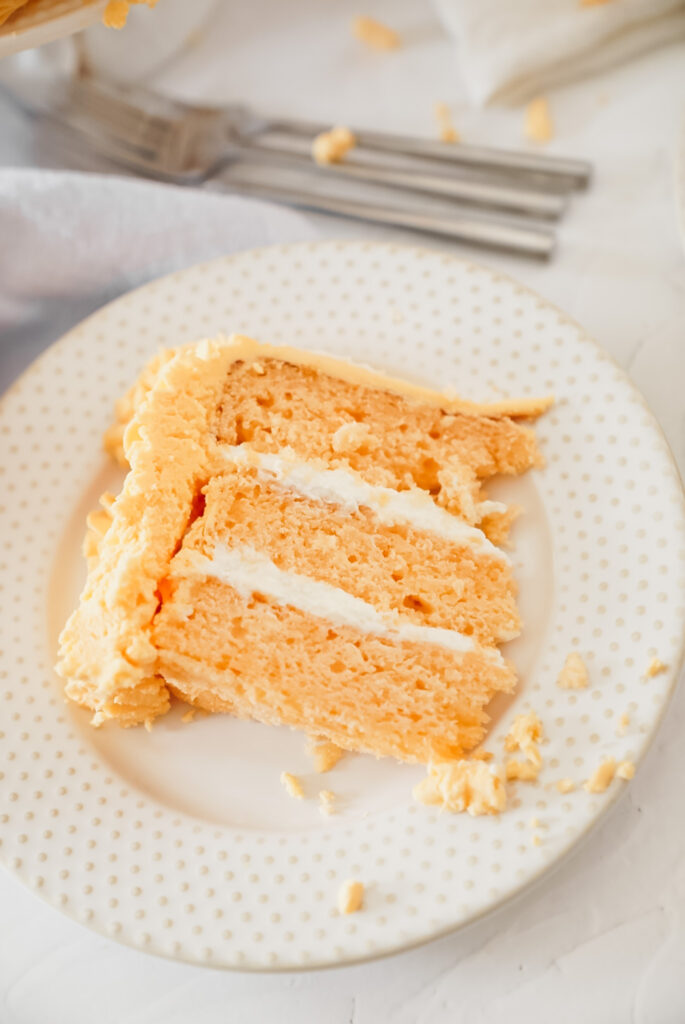
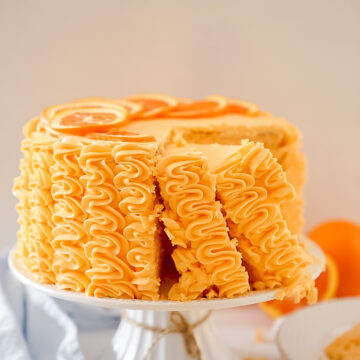
This Orange Dreamsicle Cake will most definitely brighten up your day. It is a three layered citrusy orange cake with a creamy filling. And to top it off, it has a delightful orange buttercream. This is a must make cake to start off your spring!
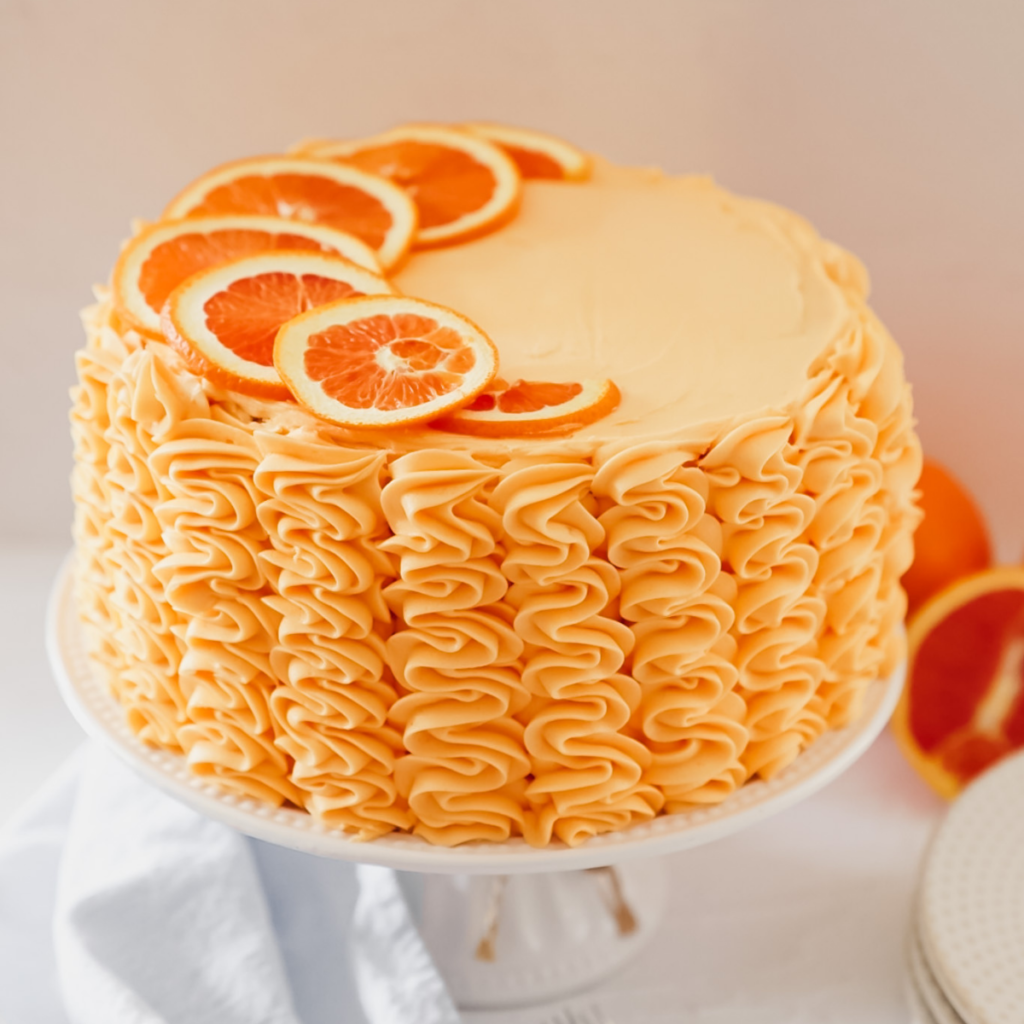
The orange cake layers are seriously to die for and the best part of the cake. They are made with orange jello, orange zest, and orange extract, and are perfectly balanced to create that perfect orange dreamsicle cake flavor.
If you need other delicious spring flavors, try these out!
Graham Cracker Cake With Cake Batter Buttercream, Coconut Key Lime Pie Cake, Best Vanilla Cake
Why I love this recipe
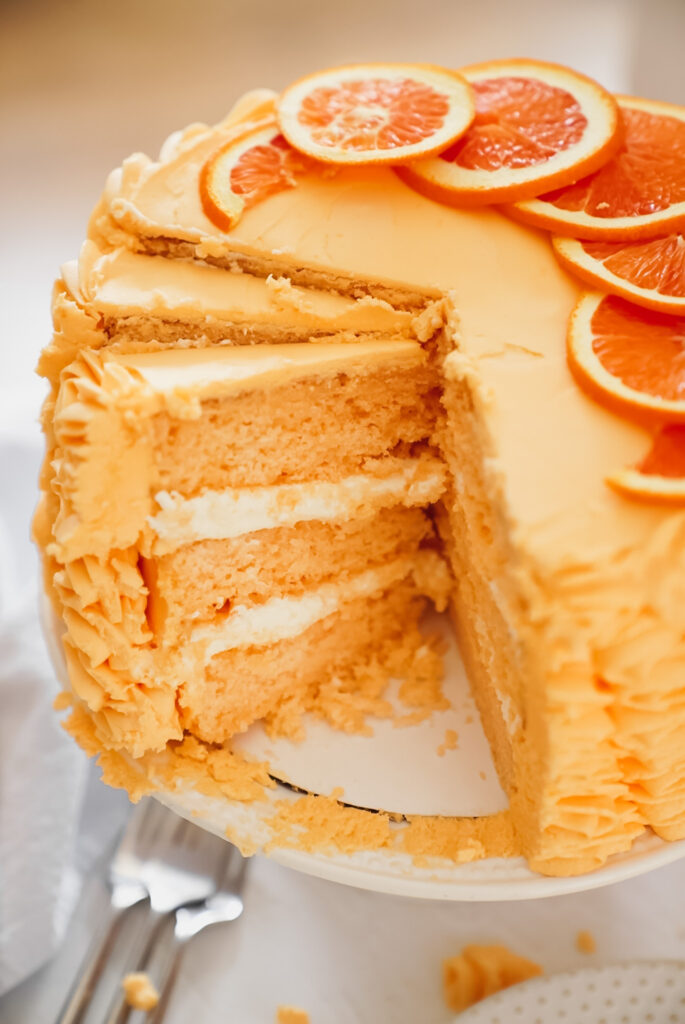
- Orange Cake Layers-These moist and tender cake layers are made by creaming the butter and sugars together to give the cake a light and airy texture. It's flavored with orange jello, orange extract, and orange zest!
- Creamy filling-The creamy filling is made with cream cheese and heavy whipping cream, which makes it twice as creamy.
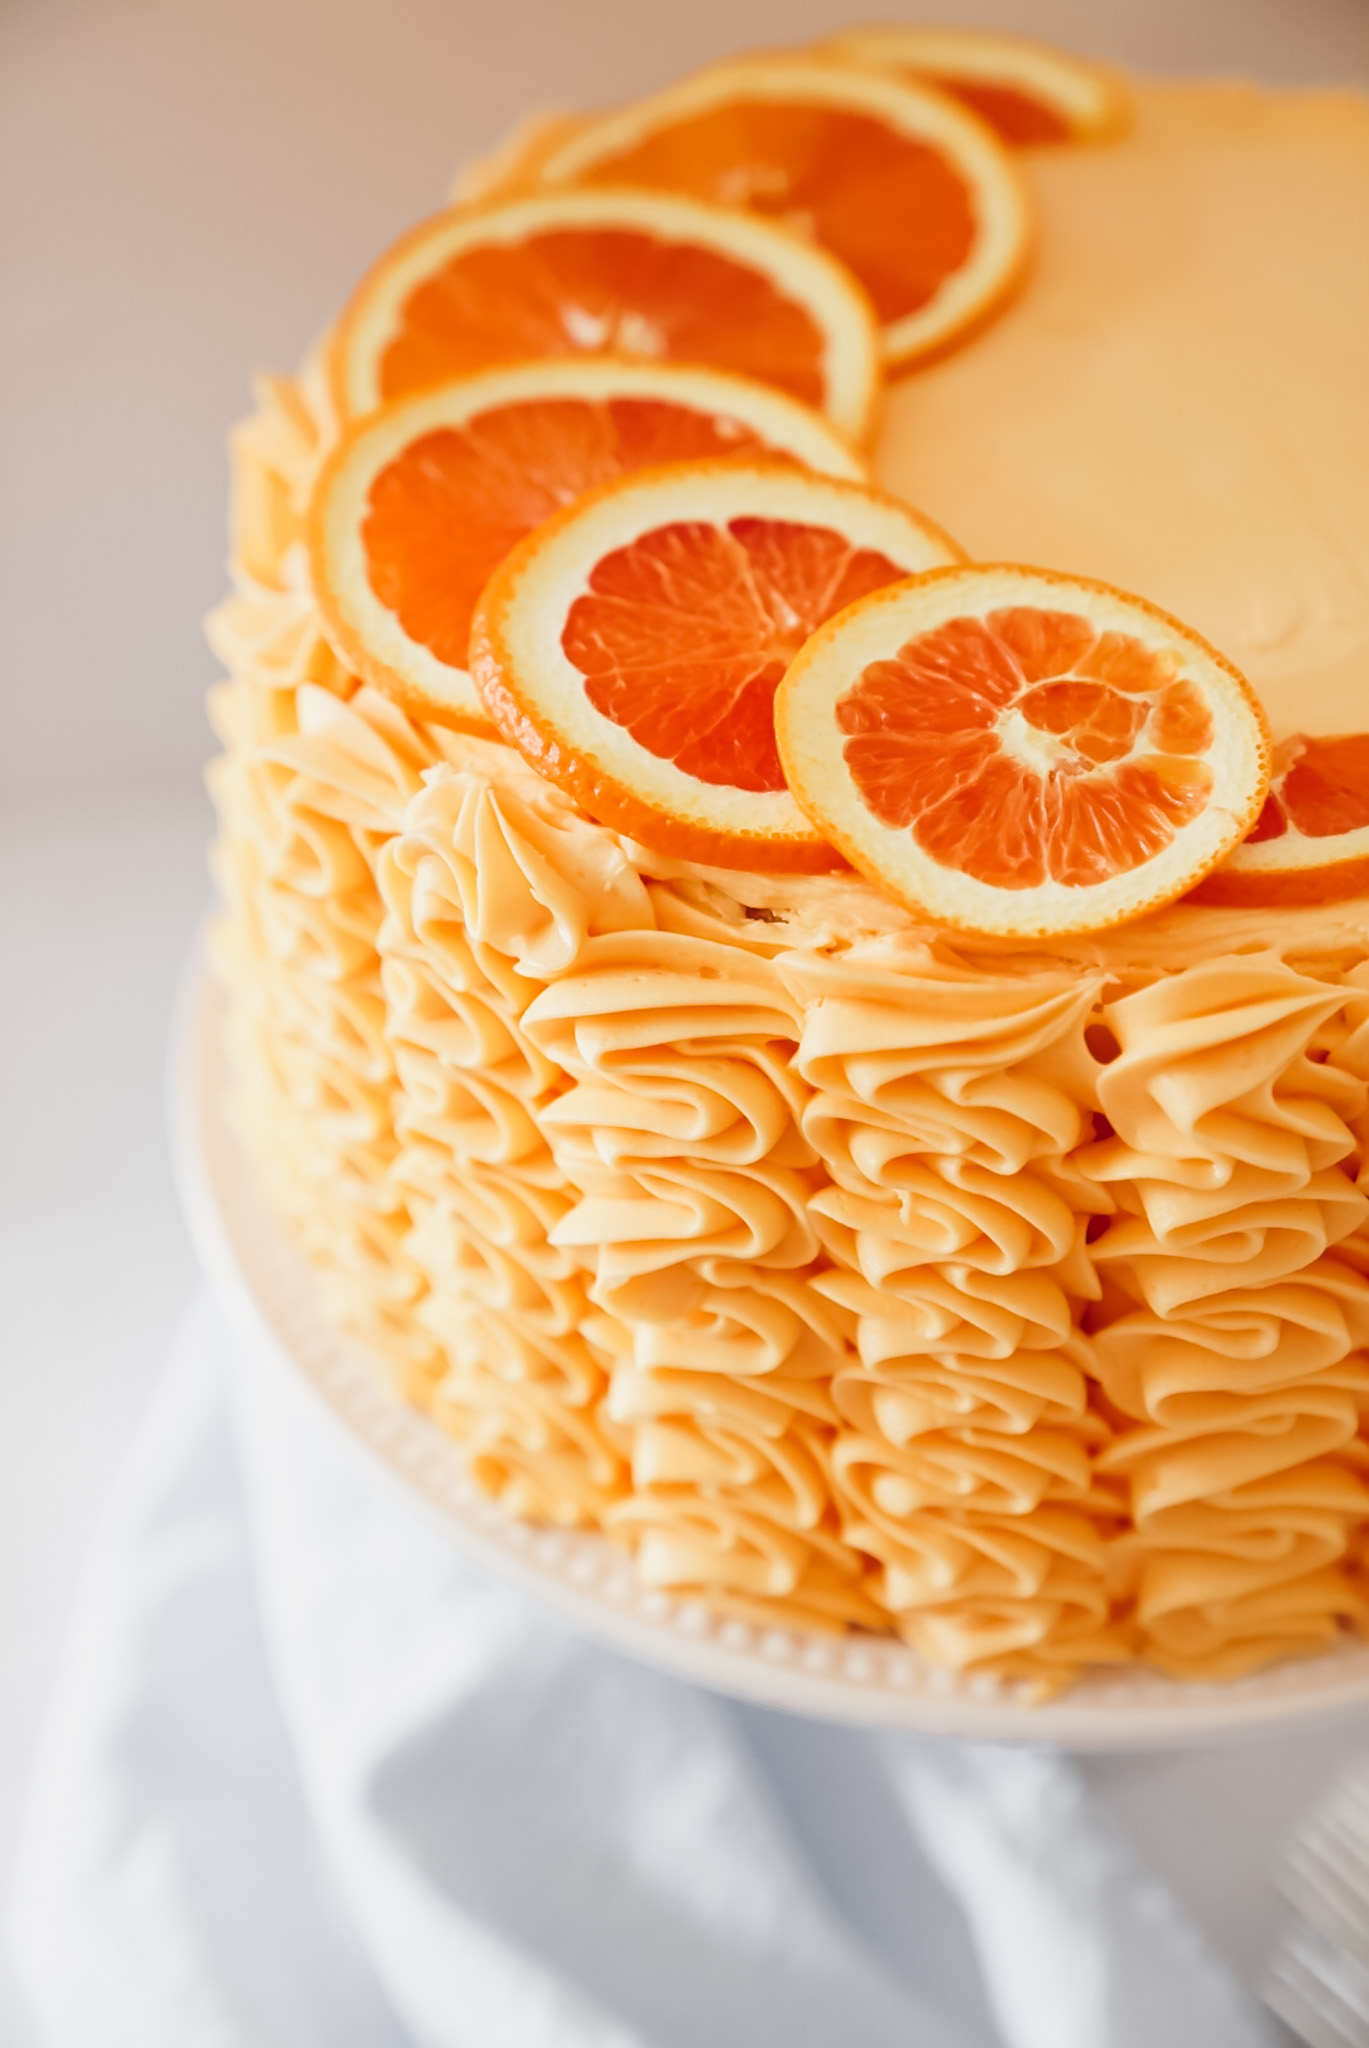
- Orange Buttercream-This orange buttercream is perfectly made with cream cheese and orange extract.

Ingredients you will need
- Unsalted butter-I always use ROOM temperature unsalted butter!
- Orange Jello-This gives the cake a perfect orange color and flavor.
- Egg yolks and whole eggs-I pull them out of the fridge about 2 hours before I start baking.
- Orange extract-I add a little to the cake batter to help with the flavor.
- 1 orange-I use the zest of one orange.
- Sour cream-This helps the cake layers become moist.
- Cake flour-For this cake, I use cake flour instead of all purpose flour. You'll love the results.
- Buttermilk-Make sure this is also at room temperature. I try to pull mine out about 2 hours before I start baking..
- Powdered sugar-I always sift mine to help prevent clumps in my buttercream.
- Heavy Whipping Cream-I use this in the filling and for the buttercream. It does not need to be room temperature.
Step by step instructions
STEP 1: Beat the butter, sugar, and jello. Beat them on high for 5 minutes to get a light and fluffy texture. This creates air pockets in your cake that also help it rise. I recommend beating them for 2 minutes, then scraping down the sides and beating for the remaining 3 minutes.
STEP 2: Beat the eggs. Beating the eggs after each addition is considered the "creaming method." You'll want to scrape down the bowl after each egg to really ensure that they are creamed into the butter and sugar.
STEP 3: Add the sour cream, orange extract and zest. With the mixer on low, add the sour cream and orange extract/zest.
STEP 3: Add in the dry ingredients and buttermilk. Alternate these and mix on low.
STEP 4: Bake the cake. Bake the cake layers low and slow for 28-31 minutes, depending on your oven.
STEP 5: Make the filling. Make the filling by beating the sugar and cream cheese until smooth. In a separate bowl, whip the heavy whipping cream until it forms stiff peaks. With a rubber spatula, fold the whipping cream into the cream cheese mixture.
STEP 6: Make the buttercream. Beat the butter and cream cheese on high for 5 minutes. Add the rest of the ingredients with the mixer on low and then beat for 2 more minutes.
WHAT SIZE PANS
I always use 8 inch pans from my favorite brand, Fat Daddios, which you can find here: Using high quality pans really helps your cake layers come out soft around the edges. I use 3 - 8 inch pans, but you can totally use 4 - 6 inch cake pans.
Make sure to spray the bottom of the cake pan with cooking spray, line with parchment paper, and spray again, to ensure your cakes will come out properly.
ASSEMBLING THE CAKE
- Place a small amount of frosting on the center of the cake board. This will act like a glue to help you keep your cake on the cake board while you decorate.
- Make sure your cakes are level. Place the first cake layer top side up onto the cake board.
- Make sure your layers are cold or frozen, this help reduce crumbs and makes it so the layers don't slide around.
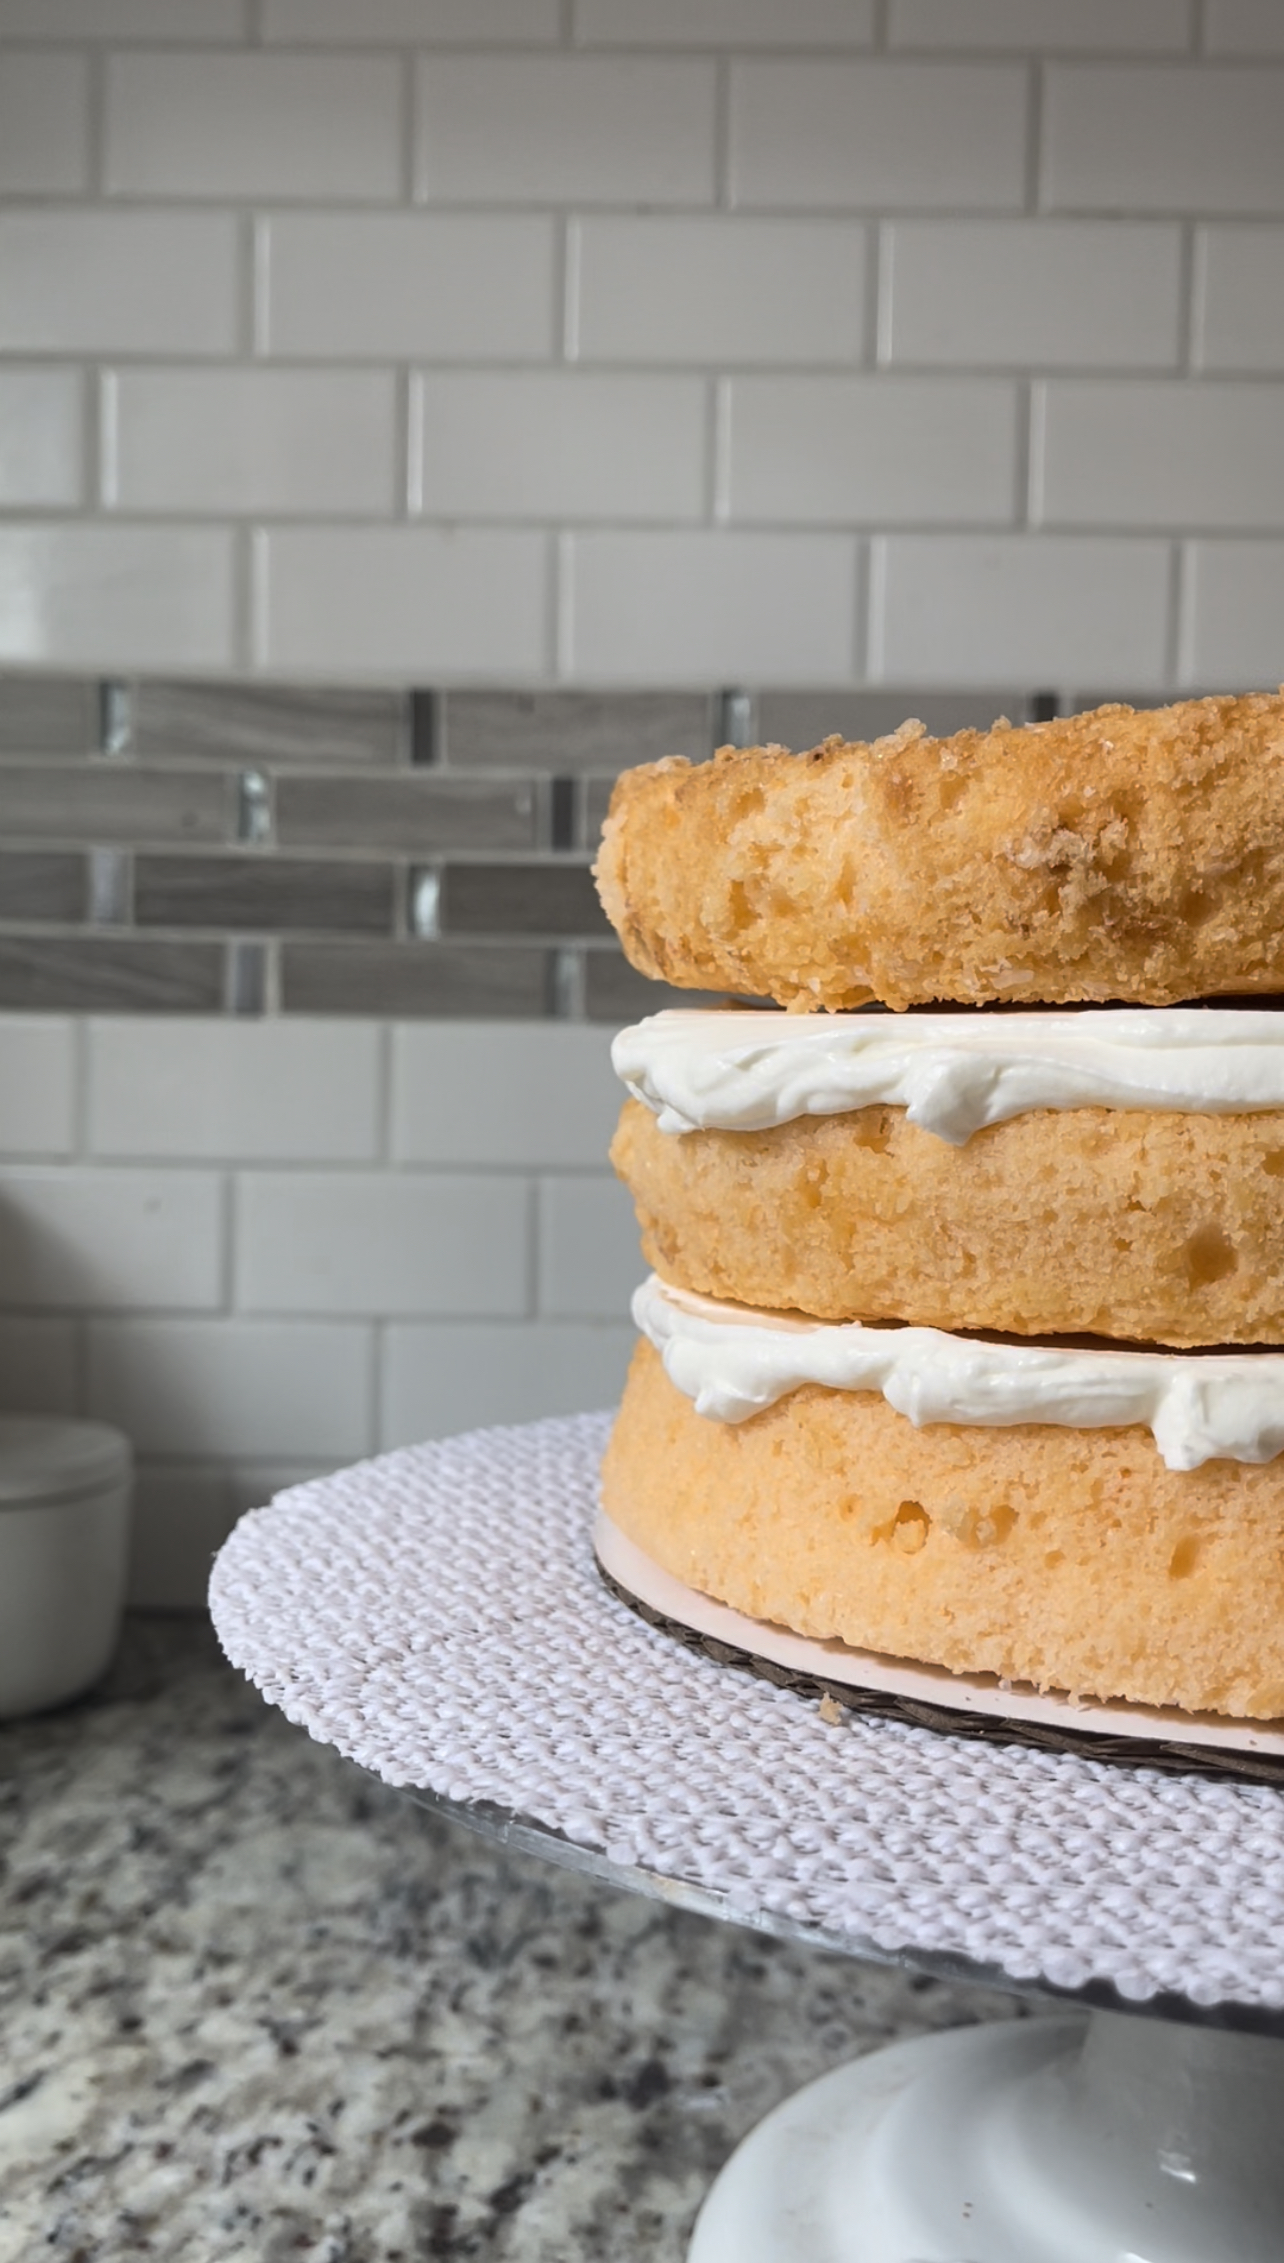
- Spread about half of the cream filling onto the center of the cake with the back of a spoon.
- Place a second cake layer on top of the filling and repeat steps 2 and 3. Place the final cake layer, top side down, on the second layer of filling.
Expert Baking Tips
- Make sure to really cream the butter and the sugar. I can't stress this enough.
- While you are prepping your orange buttercream, place the cream filling into the fridge to prevent it from getting warm and causing it to"deflate."
- I use Amerigel neon orange to get a perfect orange color.
- To get a creamy and smooth buttercream, after you are done making your buttercream, add a tablespoon of cream and beat by hand with a rubber spatula to get all the air bubbles out.
- Do a crumb coat. Don't skip out on this step. It totally helps secure the crumbs onto the cake and makes decorating easier.
- Use a turn table to help decorate your cake.
Storing
If I am dividing my cake making into multiple days, I bake my cake layers and then cool them and wrap them with plastic wrap and store them in the fridge or freezer. This help reduce crumbs and makes it so the layers don't slide around when decorating. They can be stored in the fridge for 3-5 days.
FREEZING
You can freeze the decorated cake, if you want to make it ahead of time, by simply wrapping it with plastic wrap. If you want to store it for longer than a few days, put a layer of aluminum foil over the plastic wrap. It can be stored in the freezer for up to 6 months. Once you are ready to serve the cake, pull it out of the freezer and place it in the fridge to help decrease condensation.
Other recipes you should try
Brown Butter Chocolate Chip Blondies , Brown Butter Blueberry Cookies, Cookie Dough Brownies
Recipe
Orange Dreamsicle Cake
Ingredients
For the Cake
- 1 cup unsalted butter at room temperature
- 1 ½ cups granulated sugar
- 1 oz orange Jell-O powder
- 3 egg whites at room temperature
- 2 whole eggs
- ¾ teaspoon orange extract
- Zest of one medium sized orange
- ⅓ cup sour cream at room temperature
- 3 cups cake flour
- 1 Tablespoon baking powder
- ¾ teaspoon salt
- 1 cup 360 g buttermilk at room temperature
- orange food gel optional
For the filling
- ¾ cup 173.25 g heavy whipping cream
- 6 ounces cream cheese softened
- 1 teaspoon pure vanilla extract
- 2 cups 250 g powdered sugar, measured and then sifted
For the orange cream cheese buttercream
- 1 ½ cups unsalted butter slightly chilled
- 4 ounce cream cheese slightly chilled
- 6 cups powdered sugar measured and then sifted
- ¼ cup heavy whipping cream
- ½ teaspoon pure orange extract
- ¼ teaspoon salt
Instructions
For the cake
- Preheat your oven to 325 degrees F. Spray 3 8 inch pans with cooking spray, line with parchment paper, and spray again, making sure to get the sides.
- In a medium sized bowl, sift all of the dry ingredients (flour, baking powder, and salt).
- In the bowl of an electric mixer, fitted with the paddle attachment, cream the butter, sugar, and Jell-O on high speed for about 3 minutes. With a rubber spatula, scrape down the sides and the bottom of the bowl. Beat again for 2 more minutes. The mixture will get lighter in color, which is what you want.
- With the mixer on medium-high speed, start adding the whole eggs and egg whites one at a time, scraping after each addition, and still beating on high speed. I add an egg, beat for 30 seconds, scrape down the bowl, and repeat. After they have all been added, beat on medium speed for 2 more minutes.
- With the mixer on the lowest speed, beat the sour cream, orange zest and the orange extract just until combined.
- After you have added the sour cream and the orange extract, add the orange food coloring. Then add ⅓ of the flour mixture followed by half of the buttermilk. Mix just until combined and then add ⅓ of the flour mixture, followed by the rest of the buttermilk. Finish off with the rest of the flour mixture. With a rubber spatula, make sure to scrape the bottom of the bowl.
- Pour about 17 ounces of cake batter into each of the prepared pans and with a small offset spatula or the back of a spoon, make sure to evenly spread the batter into the cake pans.
- Bake for 30 minutes. Let them cool on the counter for 15 minutes and then let them finish cooling on a cooling rack.
- After they have come to room temperature, wrap in plastic wrap and freeze before frosting the cake.
For the cream filling
- In a medium sized mixing bowl, beat the cream cheese for about 2 minutes. Scrape down the bowl, and on medium speed, sprinkle in the granulated sugar, and add the vanilla extract.
- In a chilled stainless steel bowl, whisk the heavy whipping cream until stiff peaks form.
- With a rubber spatula, fold half of the heavy whipping cream into the cream cheese mixture. Then fold in the rest.
- Store in an airtight container in the refrigerator until ready to use. This lasts 2 days while stored in an airtight container. I suggest making this filling right before stacking and filling your cake.
For the orange cream cheese buttercream
- In a stand mixer fitted with the paddle attachment, beat the butter and cream cheese on medium-high speed until smooth, about 3 minutes.
- With the mixer on low, add the powdered sugar until it's all incorporated.
- With the mixer on low, add the cream, vanilla and salt.
- Turn the mixer to medium and beat the frosting for 3 minutes, or until it is light in color.
- Use a wooden spoon to give it one last stir and push out the air bubbles.
Assembly
- Level the cakes, if needed. Place the first cake layer, top side up, in the center of a cake board. Use a dollop of frosting to act as a glue, holding it to the cake board.
- Spread half of the filling over the cake layer. Place the next cake layer with the top side up onto the cream filling. Apply the rest of the cream filling.
- Place the final cake layer, with the top side down onto the cream filling.
- Apply a thin coat of the orange cream cheese buttercream over the cake. This is the crumb coat. You'll then freeze the cake for 15 minutes to set the crumb coat and lock in the crumbs.
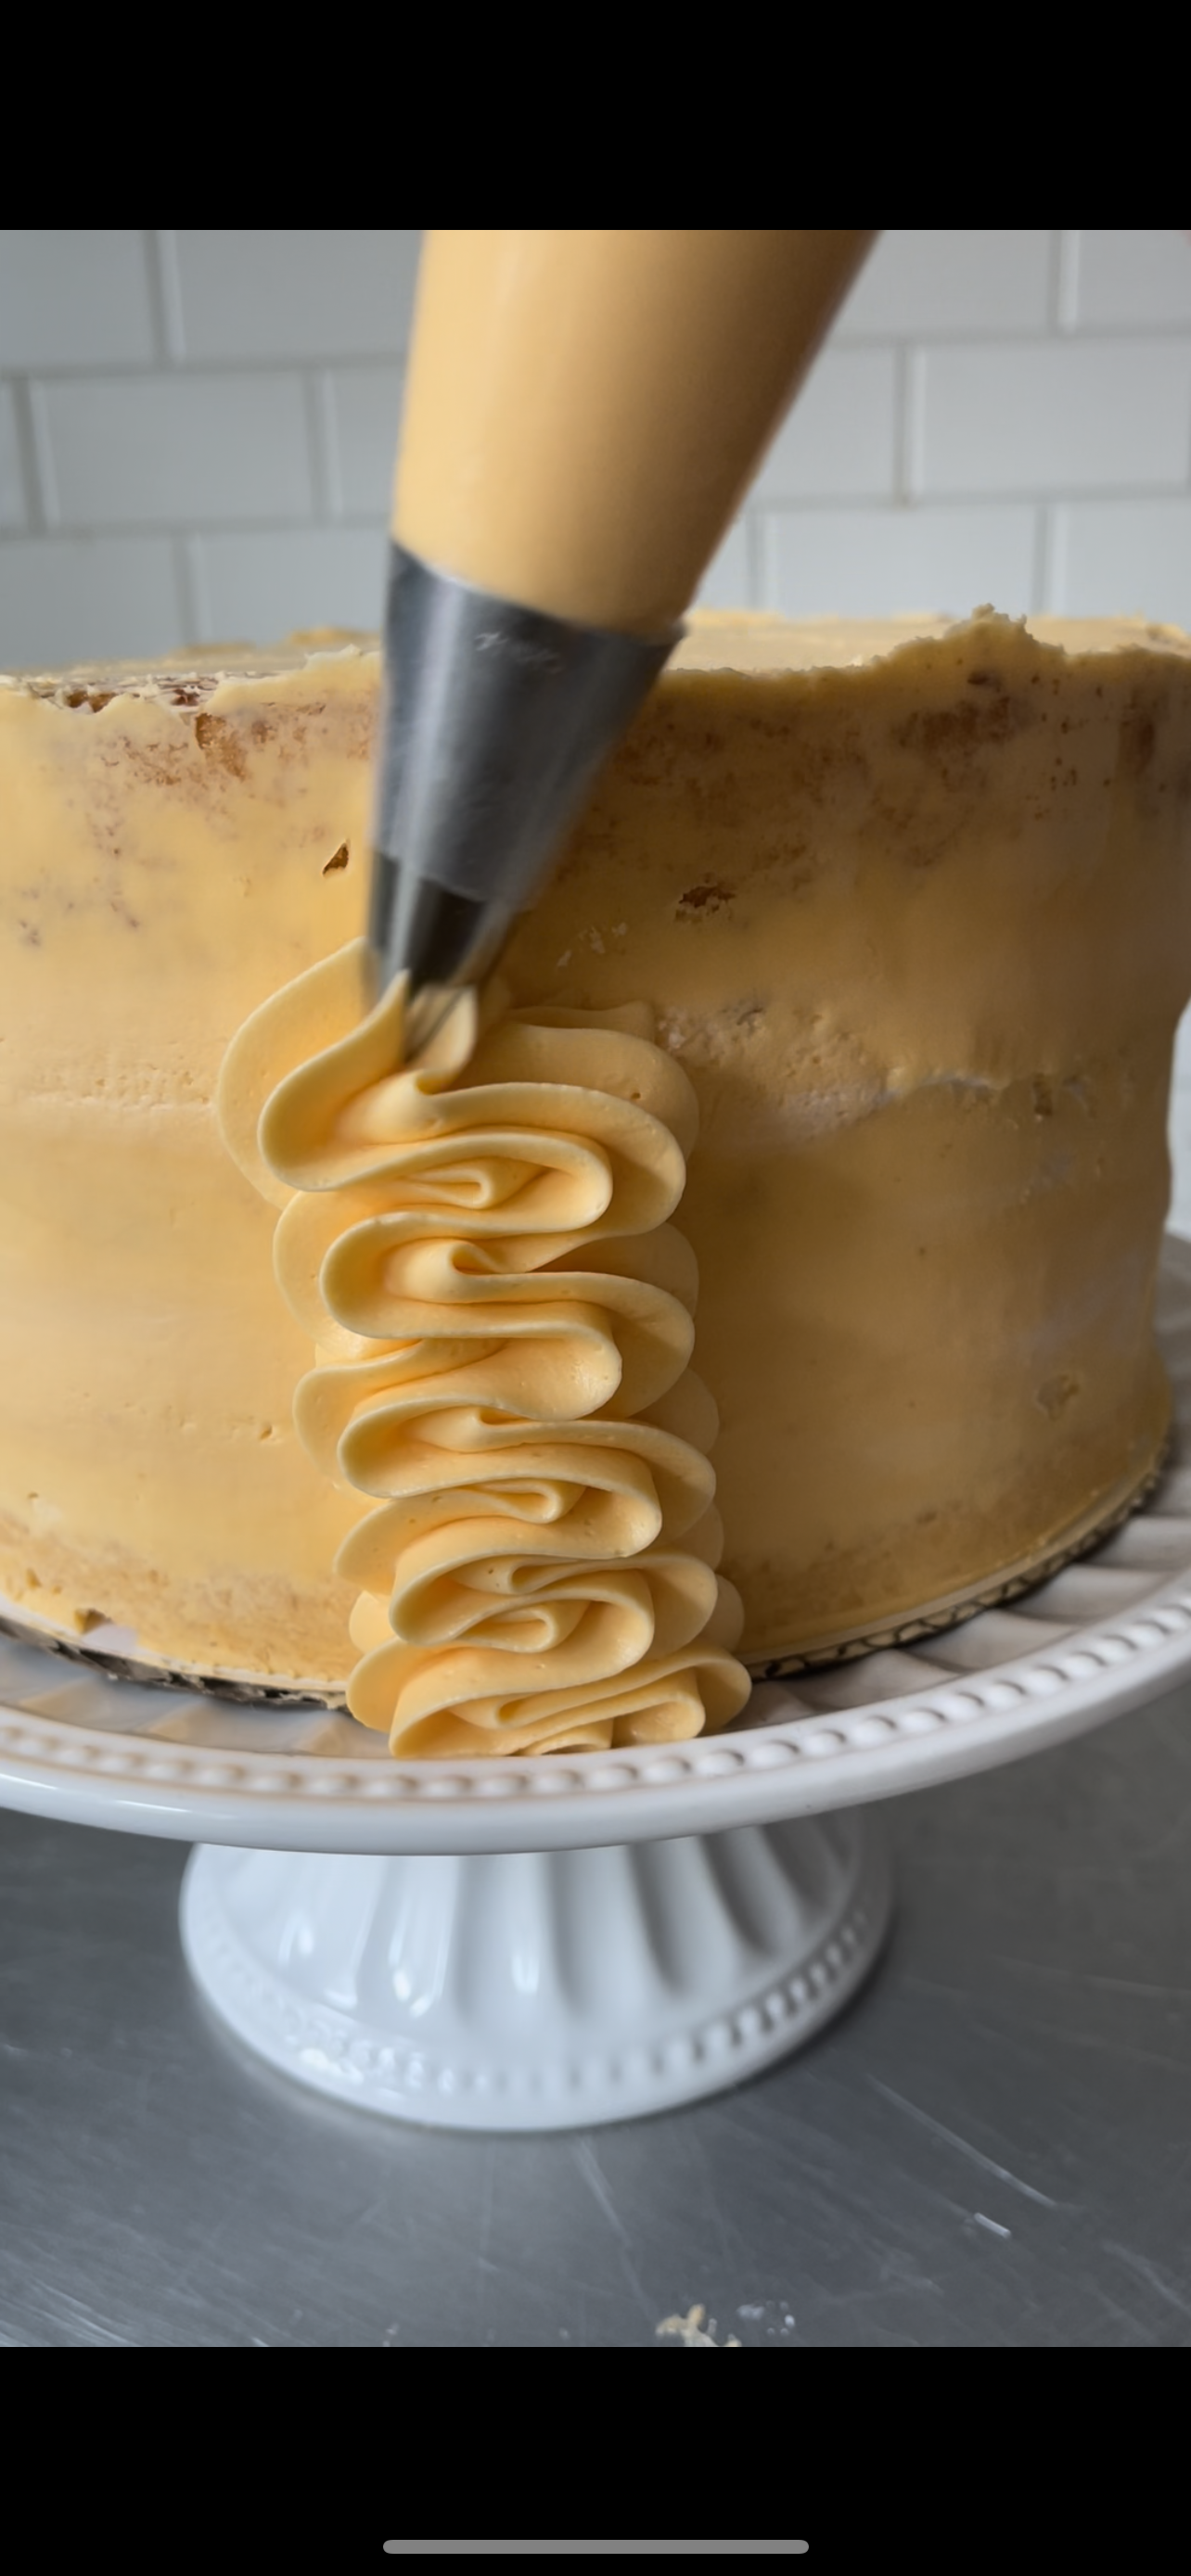
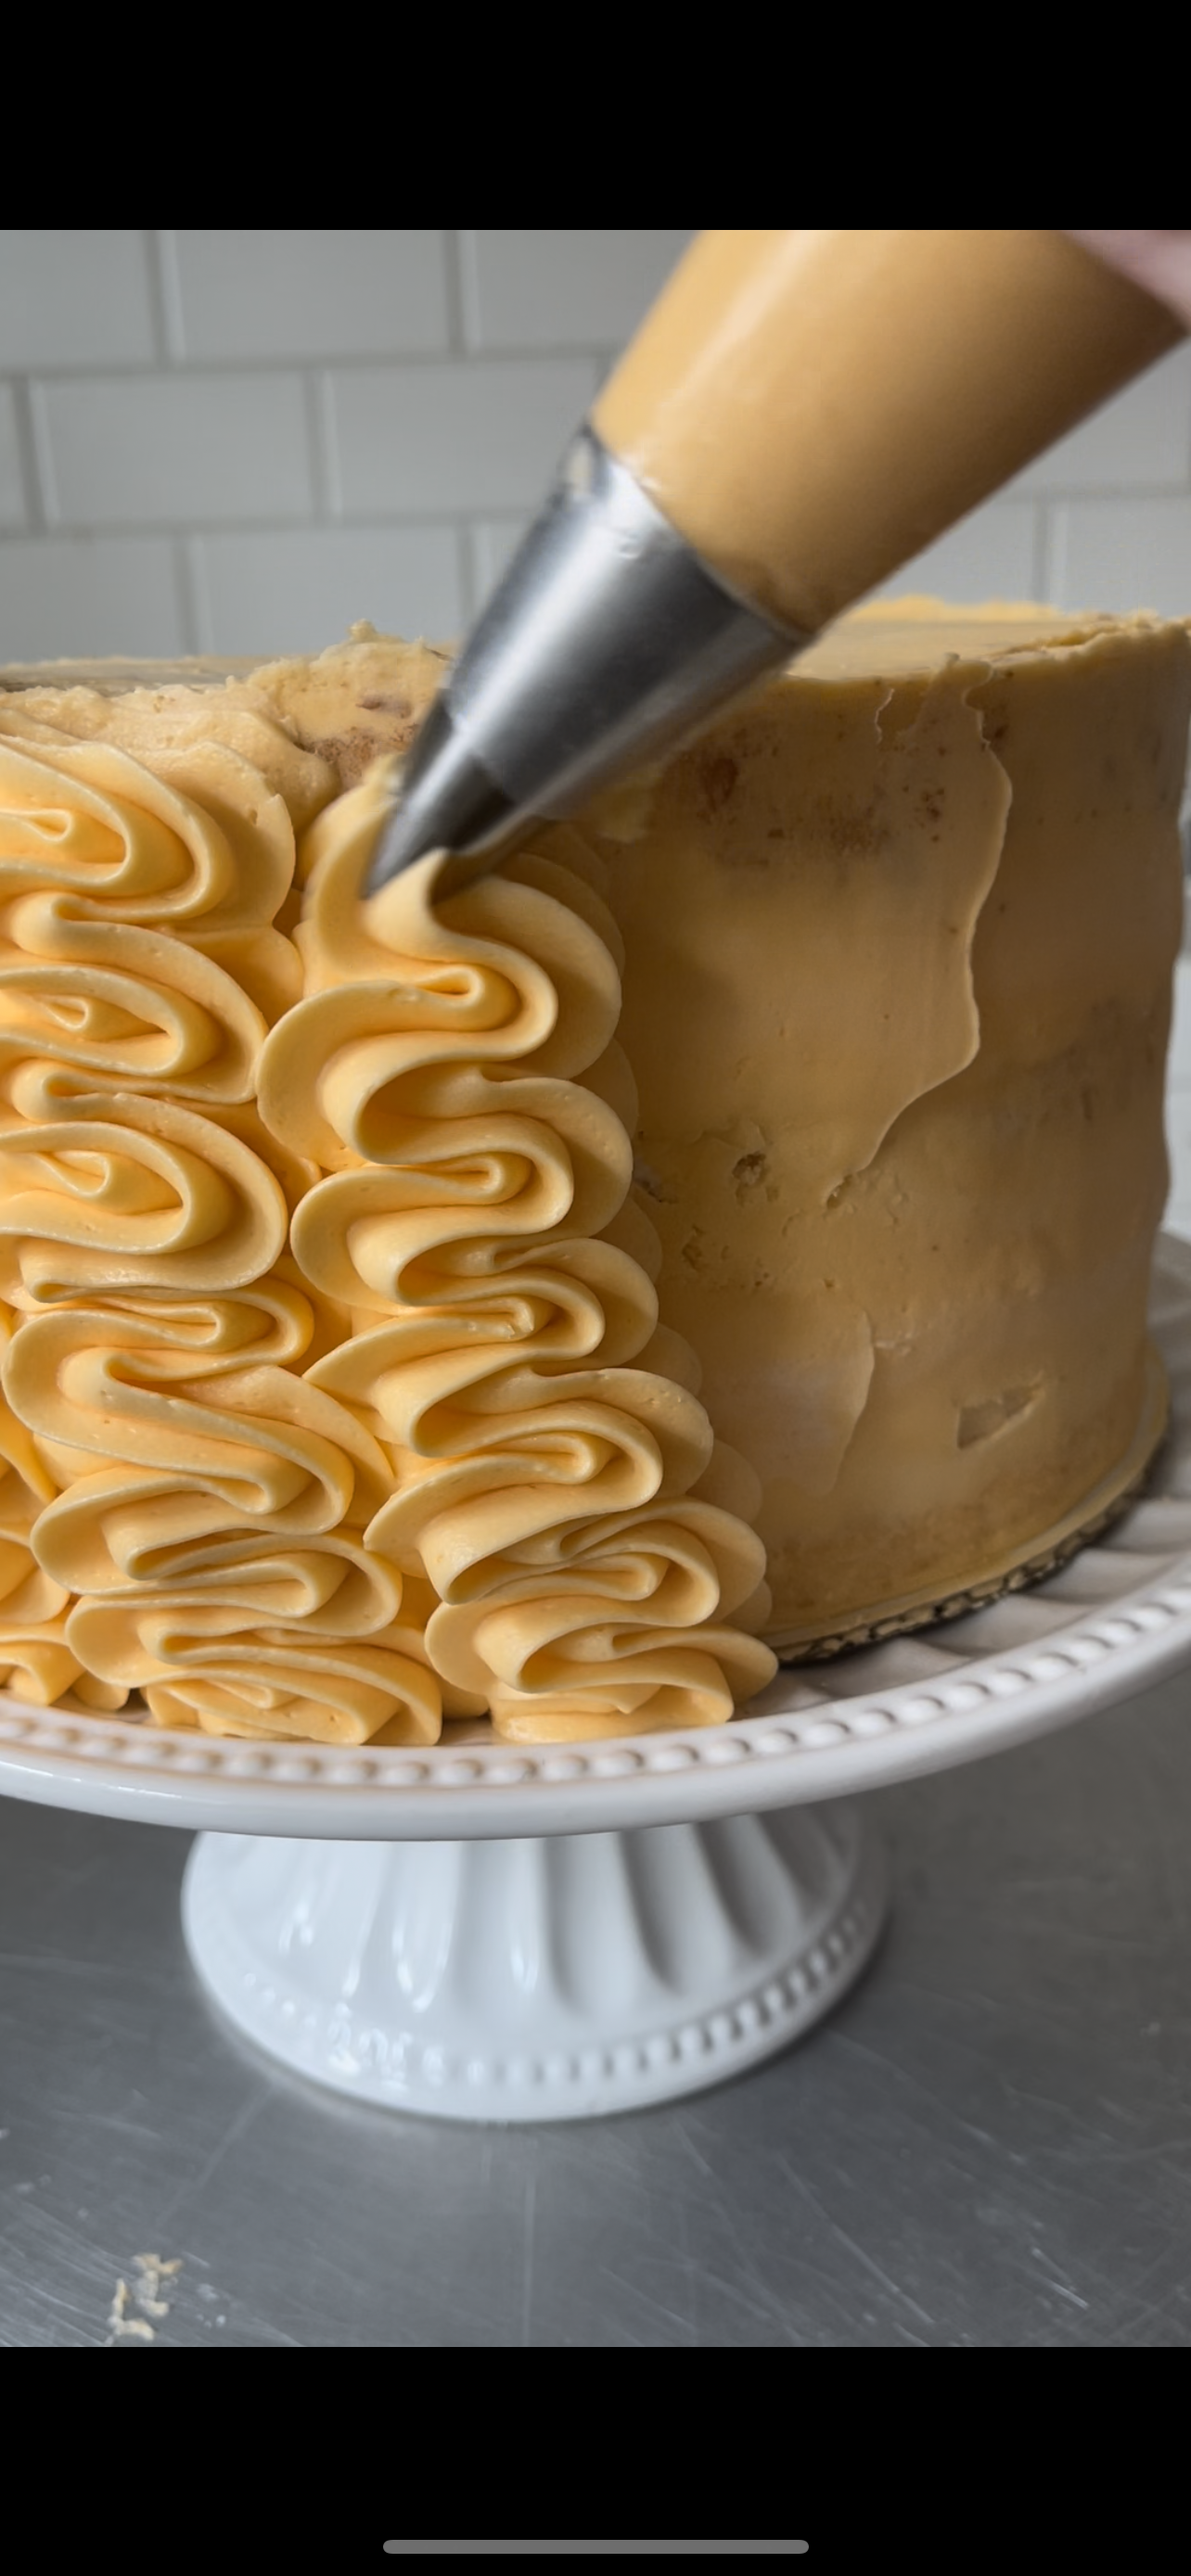
- After the crumb coat is set, finish frosting the cake with the remaining buttercream.
- Serve at room temperature
Karen says
The ingredients had granulated sugar in one place and in directions it had powdered sugar and in ingredients it had orange extract and in directions it had vanilla?