
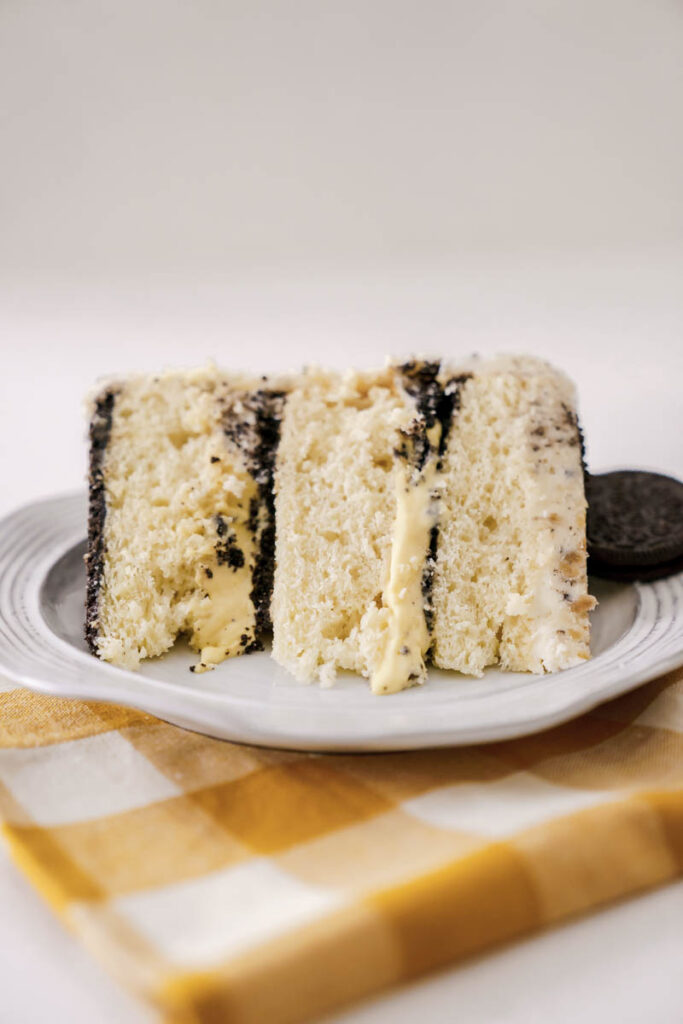
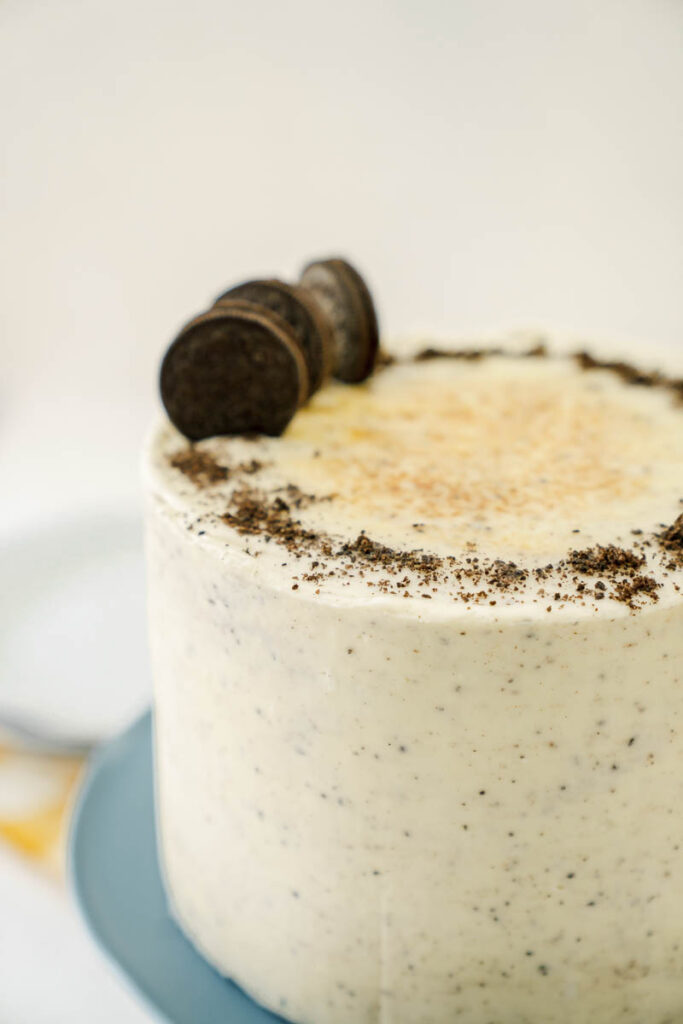
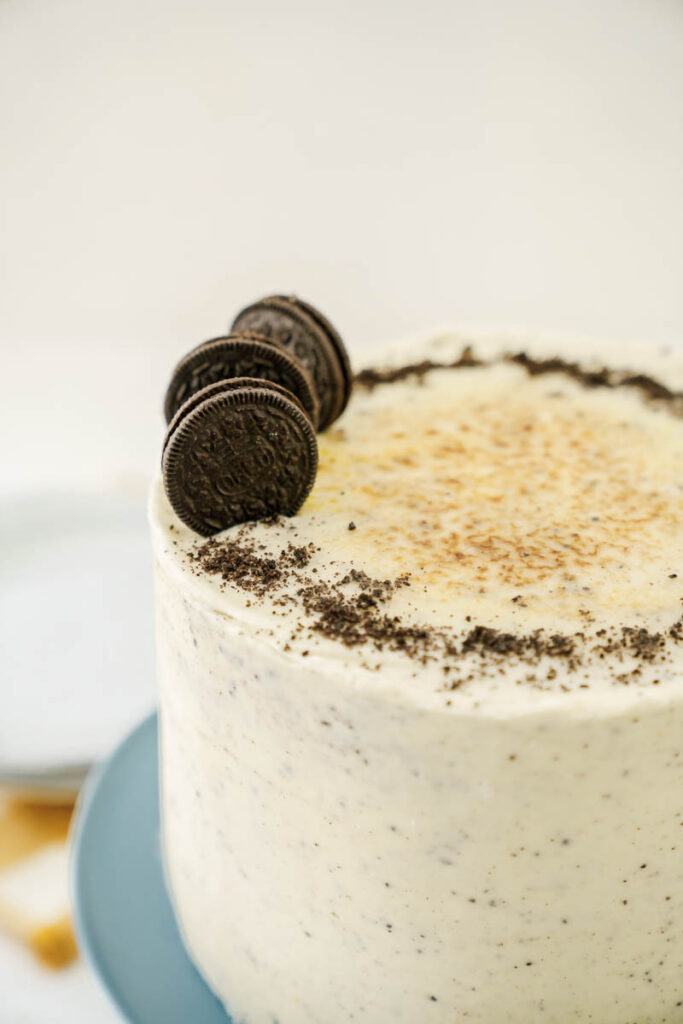
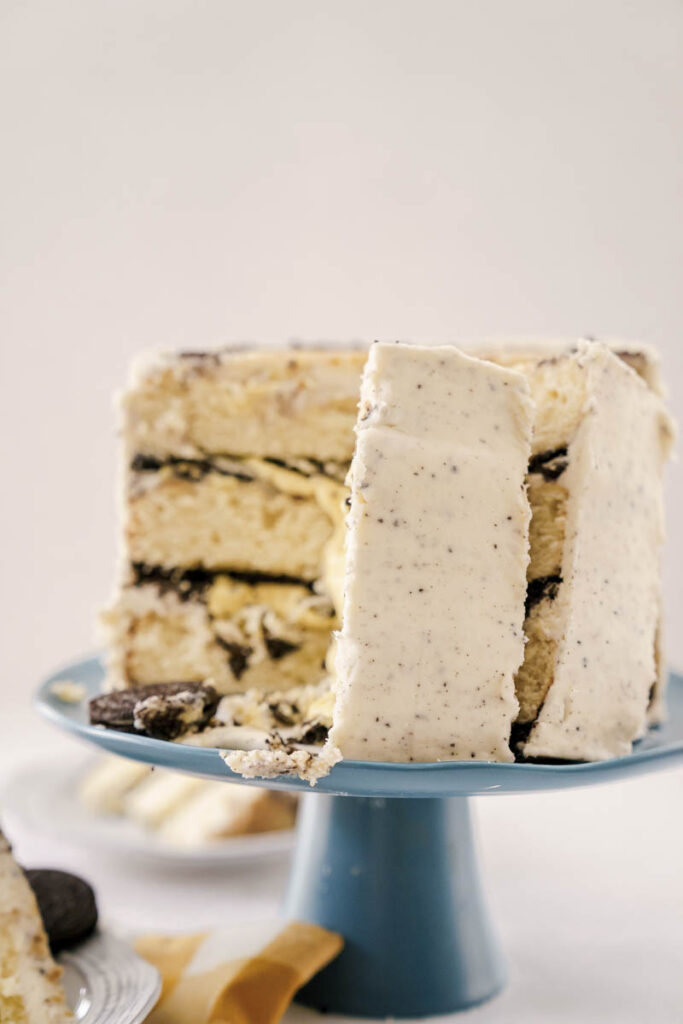
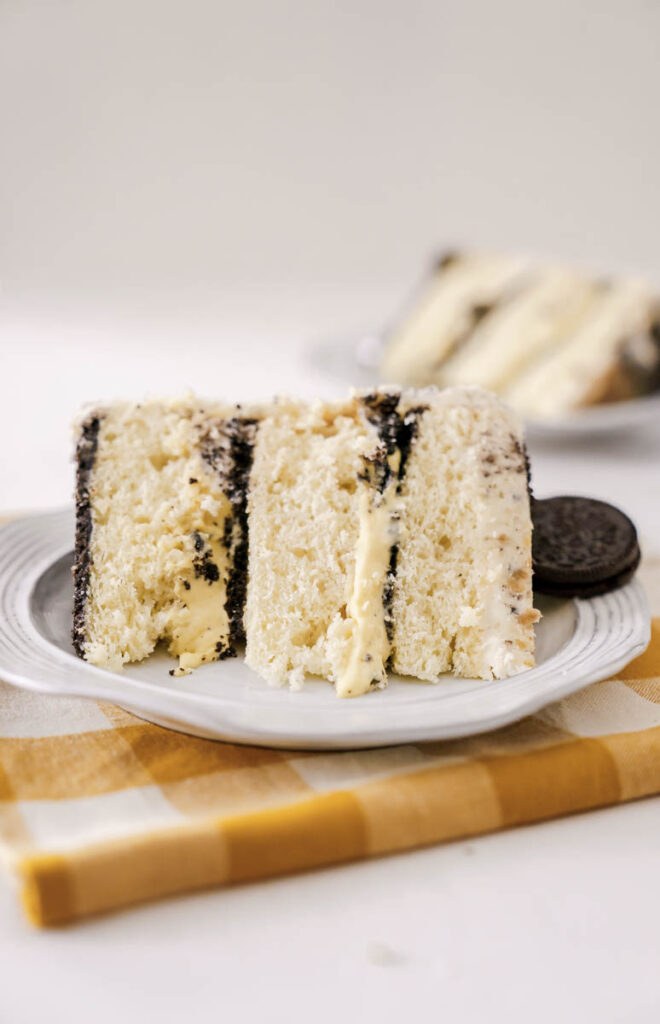
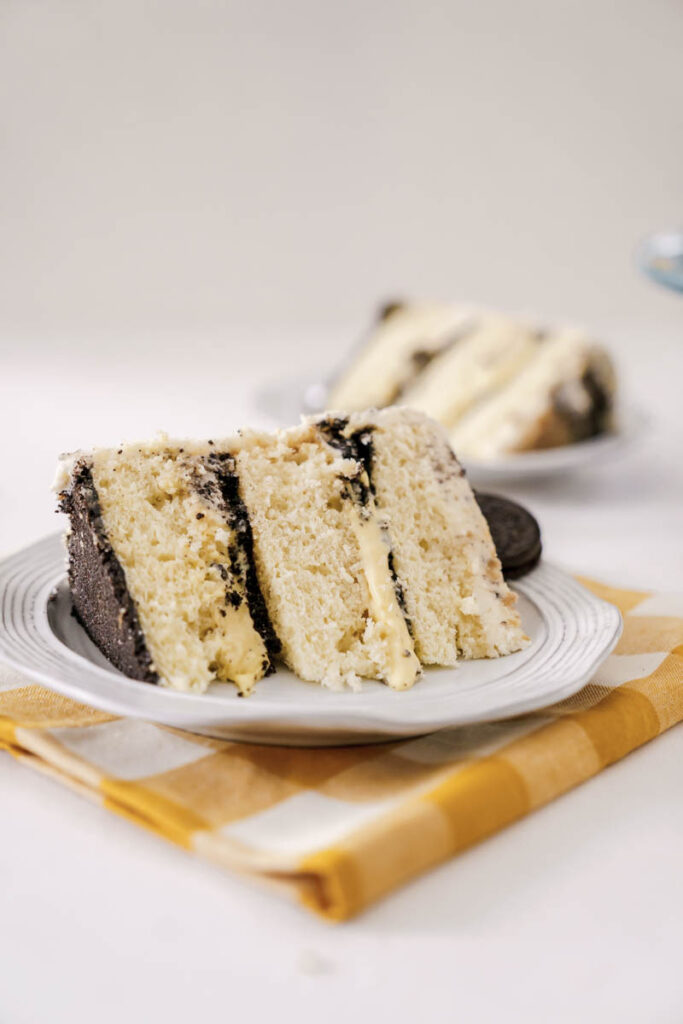
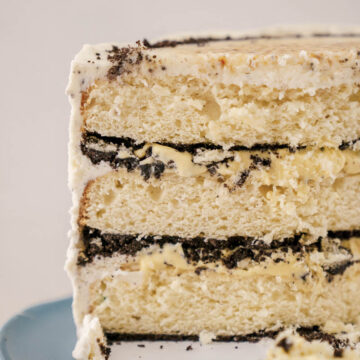
Oreo Crème Brûlée Cake - Fluffy vanilla bean cake layers baked on Oreo cookie crust, filled with a creme brûlée filling, coated in an Oreo buttercream, brûléed with a sugar top.
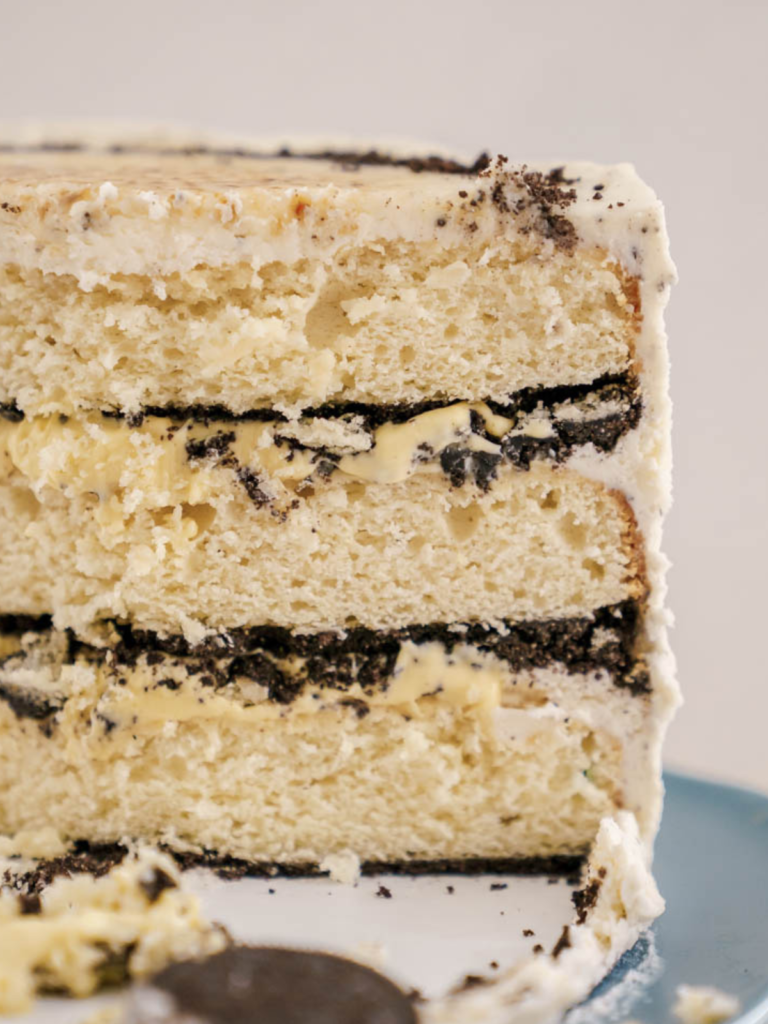
I recently had a milkshake at restaurant that was Oreo Creme Brûlée that was to die for. I knew I instantly I needed to turn it into a cake! So, thus inspiration of my new Oreo Crème Brûlée Cake. This cake while might look a little intimating, is absolutely amazing and will definitely be a staple in your house. The fluffy vanilla cake layers that have vanilla bean in them, with the soft and creamy custard filled. The flavor of the Oreo pulls the whole thing together.
For more Oreo related recipes, I will list some below!
- Best Golden Oreo Birthday Cake
- The Best Peanut Butter Oreo Cookies
- Delectable And Easy Oreo Peanut Butter Cake
- Bakery Style Oreo Chocolate Chip Cookies
Jump to:
Why bake Oreo Crème Brûlée Cake?
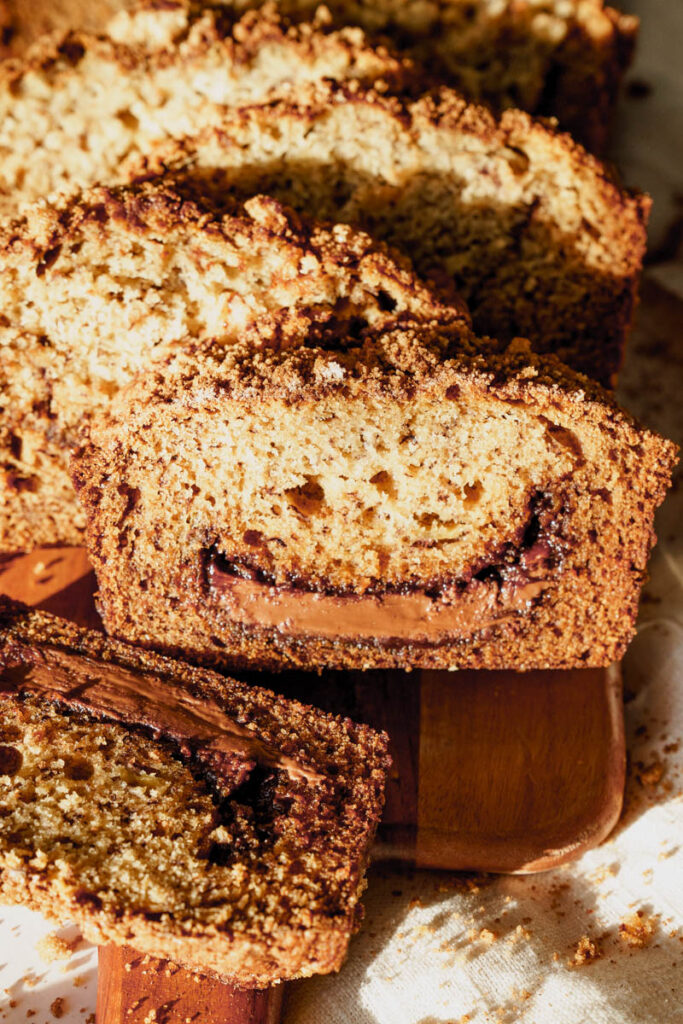
- Oreo Cookie Crust - Just like an Oreo, this crust has a great cookie crunch to it.
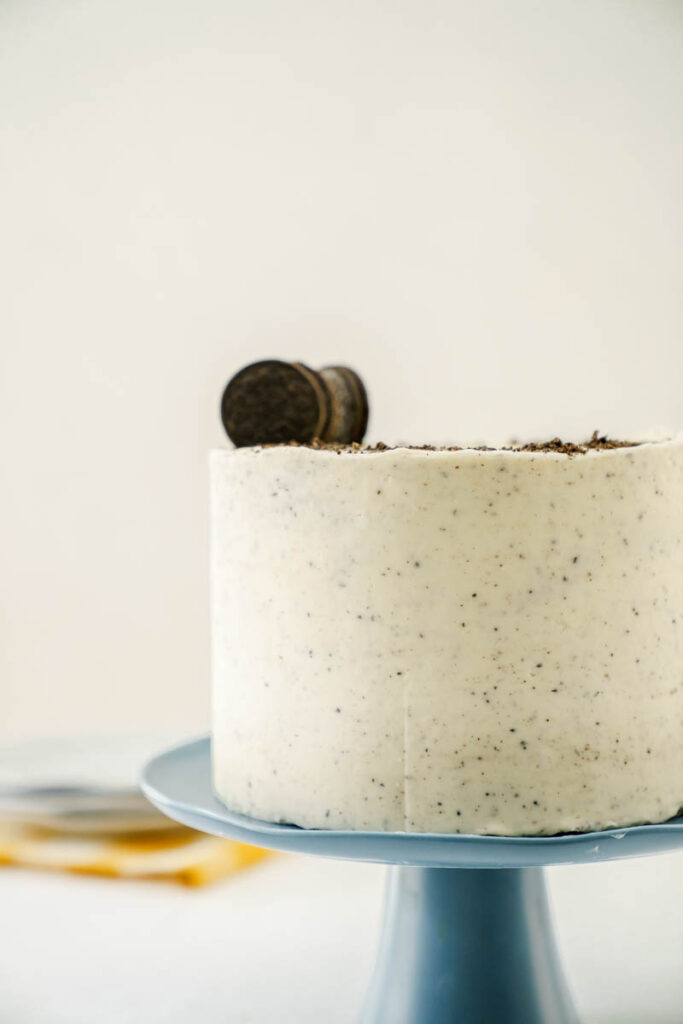
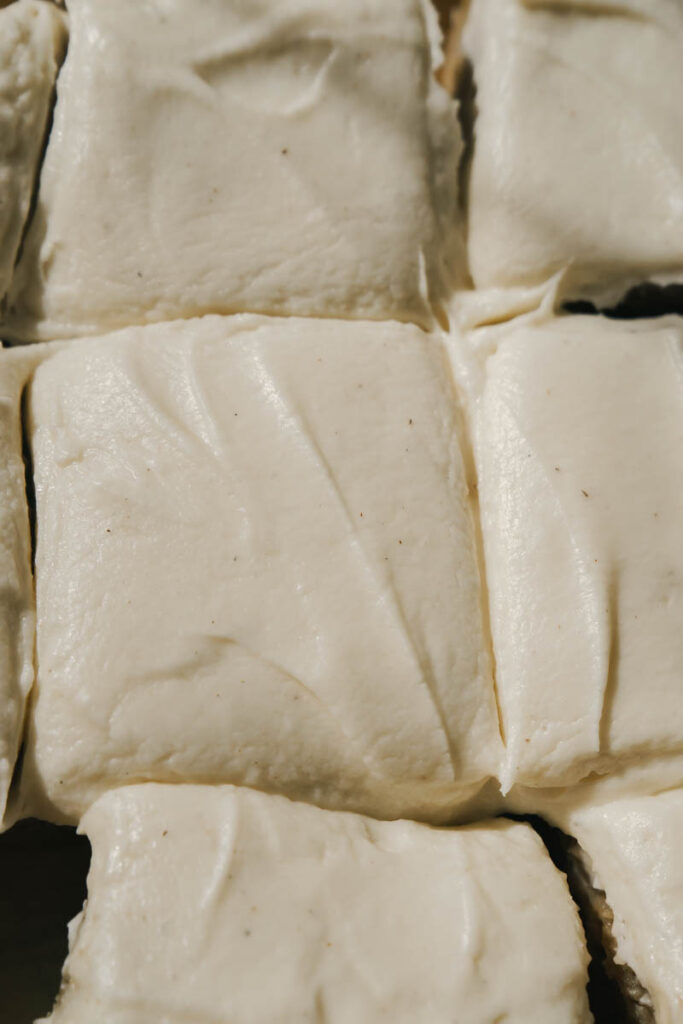
- Oreo Frosting - I don't like to pick favorites, but this one might be my favorite element of this cake. Who can resist a crunchy Oreo buttercream?
- Vanilla cake - I use my basic vanilla cake layers. I use cake flour to make sure the cake layers are smooth, silky, and moist.
- Custard filling - homemade vanilla bean custard that is creamy just like the base in creme brûlée.
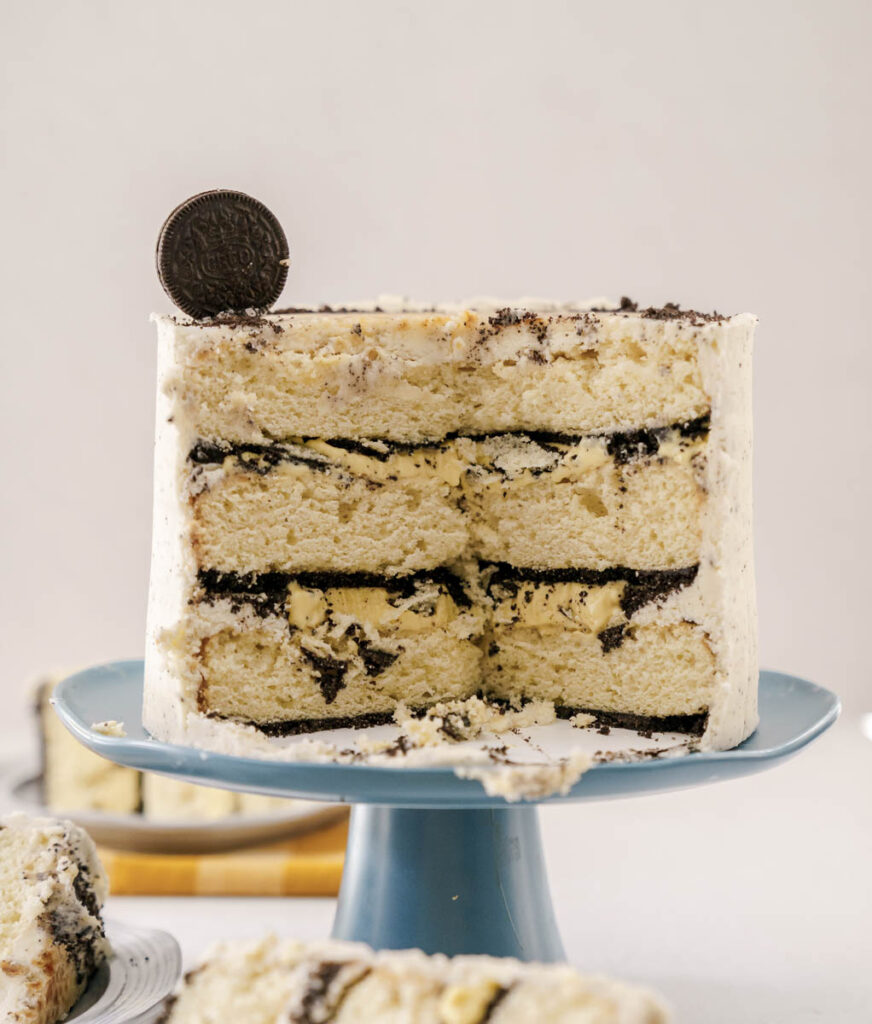
- Layered cake - this cake is made into 3 layers 8 inches around
What you'll need to make Oreo Crème Brûlée Cake
Here, are some ingredients that you will need for this recipe that you may not have in your pantry. For a full list, check out the recipe card for below.
- Vanilla extract - this one is my favorite, but if you want a cheaper one, I recommend using this one.
- Vanilla bean paste - you will use this in the custard and in the cake layers.
- Cream cheese - I used full fat, and highly recommend using full fat. I love Philadelphia, and the great value brand.
- Powder sugar - this is used for the frosting.
- Large eggs - The eggs need to be pulled out 2-4 hours before you make your cake batter.
- Buttermilk - I like full fat buttermilk, but if you can't find it no worries, just use what you can find.
- Oreos - I feel like this one is pretty obvious. I bought the largest size they had to offer. I think it was called the party pack.
Tips for making the custard
Tip 1: I used an 8x8 pan, but you can use 9x9 to hold the custard. Use a 9x13 or a sheet pan to hold the water.
Tip 2: Heat your cream to a medium boil. You want it hot, but not too hot.
Tip 3: Temper your eggs but slowly adding the hot cream into the egg yolks, and then add the egg yolk back into the hot cream while whisking the entire time.
Tip 4: Strain your mixture to remove clumps.
Tip 5: Bake your mixture in HOT water. This helps speed up the process, but if you forget, just bake it 5-10 minutes longer.
Tip 6: Cool and let the mixture set in the fridge.
Step By Step - Vanilla Cake Layers
I use my kitchen aid which I got from here. Here is the pan I used.
- Step 1: combine all dry ingredients. Whisk together the flour, baking powder, and salt. Set aside.
- Step 2: Cream the butter, oil and sugar. In the bowl of a stand mixer fitted with the paddle attachment, cream the butter, oil, and sugar on high until fluffy and smooth, about 4 minutes.
- Step3: Add the egg whites Start adding the egg whites, one at a time, beating on medium speed after each addition. Scrape the bowl after each addition. Once all the egg whites are added, beat for 30 more seconds.
- Step 4: Mix in the sour cream and vanilla. Add the sour cream and both vanilla's. Beat on medium low speed for a minute.
- Step 5: Alternate the dry and buttermilk Turn the mixer on low and add ⅓ of the flour and ½ of the buttermilk to the butter mixture and mix ON LOW until almost incorporated. Add another ⅓ of the flour and the rest of the buttermilk. Mix just until a few streaks of flour remain, then add the rest of the flour mixture. Mix just until the flour streaks are mostly gone.
- Step 6: Divide and bake. Evenly distribute the cake batter among the prepped cake pans and bake for 28-31 minutes (mine took about 31 minutes, but my oven runs a little hotter) or until a toothpick comes out with just a few moist crumbs on it or until it starts to get a little golden brown on top.
- Step 7: Let the cake cool. Remove cakes from the oven and let them cool in the pans for 15 minutes before transferring them out of the pan and placing them on cooling racks.
Tips for the buttercream
Use chilled or slightly cooled butter, this helps make the buttercream stabilized
Beat the cream cheese by itself to remove clumps. Then add the butter to ensure a smooth and creamy buttercream.
Sit your powder sugar! This will help give you a nice silky buttercream
Gently fold in the Oreo crumb's so your buttercream doesn't turn gray and stays white
Tips For Assembly
Onto assembly, I use a turn table, offer spatula, cake board, and a cake comb.
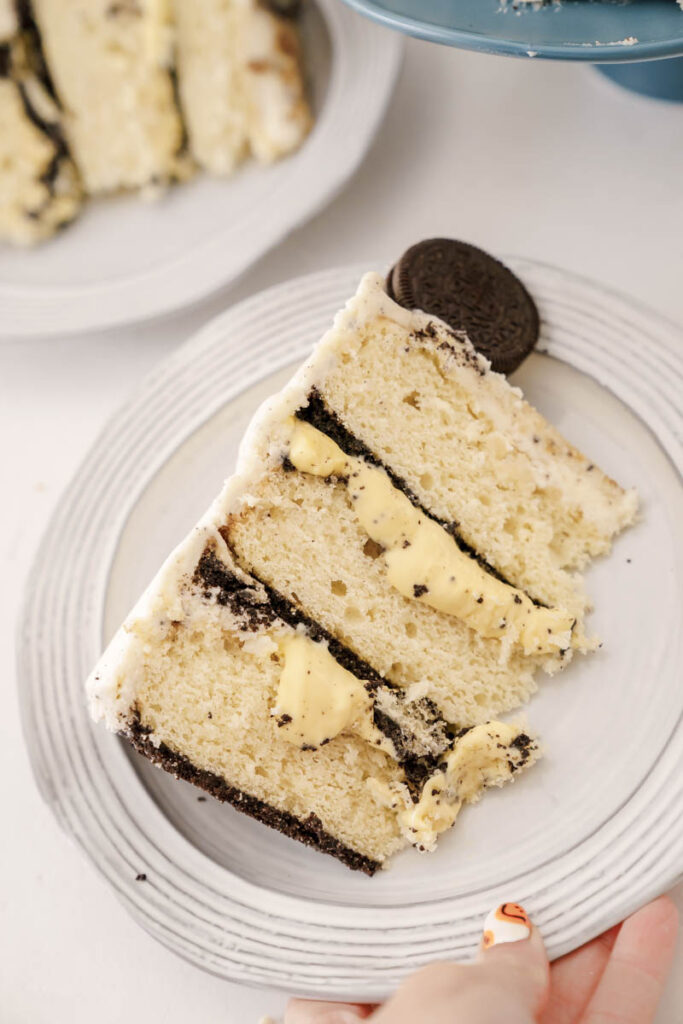
- Pipe a rim of Oreo buttercream around the edge of the cake. Fill the center of the cake with the chilled creme brûlée filling, making sure not to over fill, and whatever you have left over you can serve on the side.
- Place the second cake layer, crust side down, on top of the buttercream and filling. Repeat piping and filling.
- Place final cake layer, crust side down, on the filling.
- Apply a thin layer of the Oreo buttercream, also known as the crumb coat, and freeze for about 10 to 15 minutes to set this layer of frosting.
- Once the crumb coat is set, continue to frost the cake with the remaining frosting.
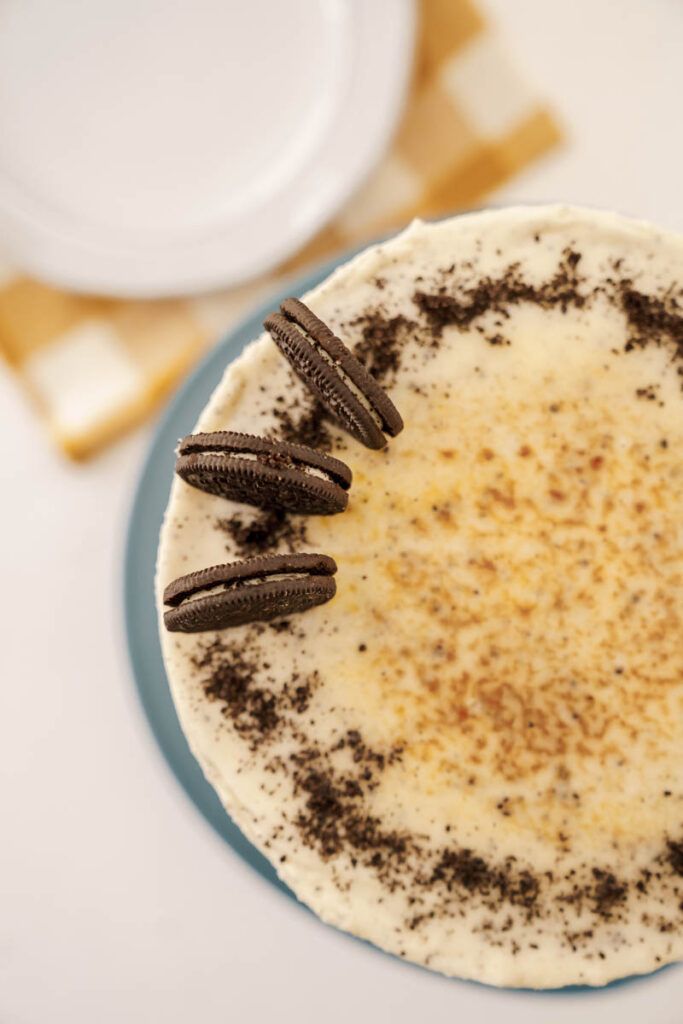
- For the creme brûlée crunch on top, lightly sprinkle some granulated sugar on top and with a kitchen torch, torch the top of the sugar to crystallize the sugar.
- Serve at room temperature, wrap leftover cakes slices in plastic wrap and will hold in the fridge for a couple days.
FAQ
Should I make this ahead of time?
Yes, I would make each element ahead of time before assembling.
Do I have to use a regular Oreo?
Honestly, any Oreo flavor would be amazing!
What size of cakes does this make?
This can make 3 8inch cake layers, 4 6 inch cake layers, 9x13 cake layers. If you are doing a 9x13, frost the cake with the oreo buttercream and then apply the filling on top of the oreo buttercream.
Storing And Freezing
Finally, how to store this Oreo Crème Brûlée Cake! Cover in plastic wrap (Slices or the whole cake) and store in the fridge for up to 5 days.
Freezing - Oreo Crème Brûlée Cake
Furthermost, you can freeze this cake before it is decorated! After it is decorated, you can freeze the whole or cut up pieces. It will last in the freezer covered in plastic wrap for 30 days.
How to serve: Once the cake is frosted, you can cut the cake into 12-16 slices. I like to serve the cake at room temperature, and my husband likes to serve it in a bowl with milk poured over it.
Lastly, for more fun cake recipes, and all things delicious, I have listed some of my favorite below.
Remember LEAVE A STAR AND A COMMENT REVIEW if you love the recipe or any questions. Follow me on Instagram, Pinterest, and TikTok. I post so many fun things on all platforms!
Recipe
Oreo Creme Brûlée Cake
Ingredients
For the Custard Filling (make 1-2 days in advance)
- 2 cups heavy whipping cream
- ¾ teaspoon vanilla bean paste
- 2 teaspoon pure vanilla extracr
- ½ cup granulated sugar
- 5 egg yolks from large eggs (save the extra whites to make the cake)
For The Crust
- 2½ cups finely ground Oreo Cookies about 30 cookies
- 2 Tablespoons granulated sugar
- ½ cup unsalted butter melted
For the Cake
- 1 cup unsalted butter room temperature
- 1¾ cup granulated sugar
- 2 tablespoons vegetable oil
- 6 large eggs whites room temperature
- ⅓ cup sour cream room temperature
- 1 Tablespoon pure vanilla extract
- 1 teaspoon vanilla bean paste
- 3 cups cake flour spoon and leveled
- 1 Tablespoon baking powder
- 1 teaspoon salt
- 1¼ cups buttermilk room temperature
For the Oreo Buttercream
- 6 Oreo cookies ground into a fine crumb
- 1 ½ cups unsalted butter slightly cold
- 4 ounces of cream cheese softened
- 6 cups powdered sugar measured and then sifted
- 3 Tablespoons heavy whipping cream
- 1 teaspoon vanilla extract
- Pinch of salt
- This recipe makes just enough to stack and fill a cake if you want to make the dollops on top like mine I suggest doing an additional half batch.
Instructions
For the Custard filling
- Preheat your oven to 300 degrees F. Using an 8"x8" or 9x9 square baking pan, in a 9"x13" baking pan (you can also use a cookie sheet. (Make sure the smaller pan can fit into a bigger pan to create a water bath)
- In a medium size saucepan, combine the half of the heavy cream, vanilla extract, vanilla bean paste, and sugar. Bring the mixture to a soft boil and with a rubber spatula, stir about every 45 seconds to prevent it from burning. Once there is a medium boil, remove from heat and add the remaining heavy cream.
- Next we are going to temper the eggs. (tempering means to combine room-temperature eggs with hot liquid in a controlled manner to create a stable base) Make sure the eggs are in a big enough bowl to add ⅓ cup of cream to it.
- In a small-medium size bowl, add the egg yolks to the bowl, using a whisk, slowly whisk about ⅓ cup of the hot cream mixture to the egg yolks while whisking the entire time. Once the egg mixture has been combined, take the eggs mixture and slowly pour it back into the cream mixture while whisking the entire time to prevent the eggs from becoming cooked.
- In a fine strainer or a cheese cloth, pour the custard into your prepped 8x8 or 9x9 pan.
- Add HOT water to the bigger size pan and making sure the water goes up about ¾ inch on the pan.
- Bake the custard for about 45 to 50 minutes. If you added room temp water, your mixture may take up 5-10 more minutes more. The center should be barely set, and it might look a little jiggly as you move it. Let cool at room temperature for 2 hours and then cover with plastic wrap and refrigerate for at least 4 hours before using. The longer it sits the more stabilize it becomes. Don't let it sit longer than 5 days.
For the Oreo crust
- Preheat your oven to 325 degrees F. Spray three 8-inch or four 6-inch round cake pans with cooking spray and then line with parchment paper. Spray again. Set aside.
- Place the Oreo cookies in a food processor or blender and pulse until the Oreos are finely ground.
- In a medium-sized bowl, combine the Oreo crumbs, sugar and melted butter. Stir until all the Oreo crumbs are moistened by the melted butter. You should be able to scoop it by hand and have it all stick together.
- Divide the mixture evenly between the pans (about a cup of crumbs for each pan) and press down firmly with your hand or the back of a flat measuring cup.
- Bake for 10 minutes. Let cool while you make the cake layers.
For the cake
- Keep your oven at 325 F
- In a medium sized bowl, whisk together the flour, baking powder, and salt. Set aside.
- In the bowl of a stand mixer fitted with the paddle attachment, cream the butter, oil, and sugar on high until fluffy and smooth, about 4 minutes. With a rubber spatula, scrape the bottom and sides of the bowl.
- Start adding the egg whites, one at a time, beating on medium speed after each addition. I usually beat each egg white for about 30 seconds. Scrape the bowl after each addition. Once all the egg whites are added, beat for 30 more seconds.
- Add the sour cream and both vanilla's. Beat on medium low speed for a minute. If the mixture looks clumpy, don't worry, once you add the flour mixture it will smooth out.
- Turn the mixer on low and add ⅓ of the flour and ½ of the buttermilk to the butter mixture and mix ON LOW until almost incorporated. Add another ⅓ of the flour and the rest of the buttermilk. Mix just until a few streaks of flour remain, then add the rest of the flour mixture. Mix just until the flour streaks are mostly gone.
- Evenly distribute the cake batter among the prepped cake pans and bake for 28-31 minutes (mine took about 31 minutes, but my oven runs a little hotter) or until a toothpick comes out with just a few moist crumbs on it or until it starts to get a little golden brown on top.
- Remove cakes from the oven and let them cool in the pans for 15 minutes before transferring them out of the pan and placing them on cooling racks.
- When cakes are completely cooled, wrap each cake layer individually with plastic wrap and stick it in the refrigerator or freezer until you're ready to frost
For The Buttercream
- In a stand mixer fitted with a paddle attachment, cream the butter on medium-high speed for about two minutes.
- With the mixer on low speed, add all of the sifted powdered sugar at once and mix on low just until incorporated. With a rubber spatula, scrape down the sides of the bowl.
- Add the heavy cream, salt and vanilla, increase the speed to medium-high and beat the frosting for five minutes. It should get lighter in texture and color.
- With the rubber spatula, gently stir in the cookie crumbs until you start seeing gray streaks.
Assembly
- Place the first cake layer top side up on the cake board. With the Oreo crust on top of the cake board. Pipe a rim of Oreo buttercream around the edge of the cake. Fill the center of the cake with the chilled creme brûlée filling, making sure not to over fill, and whatever you have left over you can serve on the side.
- Place the second cake layer, crust side down, on top of the buttercream and filling. Repeat piping and filling.
- Place final cake layer, crust side down, on the filling.
- Apple a thin layer of the Oreo buttercream, also known as the crumb coat, and freeze for about 10 to 15 minutes to set this layer of frosting.
- Once the crumb coat is set, continue to frost the cake with the remaining frosting.
- For the creme brûlée crunch on top, lightly sprinkle some granulated sugar on top and with a kitchen torch, torch the top of the sugar to crystallize the sugar.
- Serve at room temperature, wrap leftover cakes slices in plastic wrap and will hold in the fridge for a couple days.
Kaylin says
Thank you for sharing this recipe that is absolute heaven!!!