
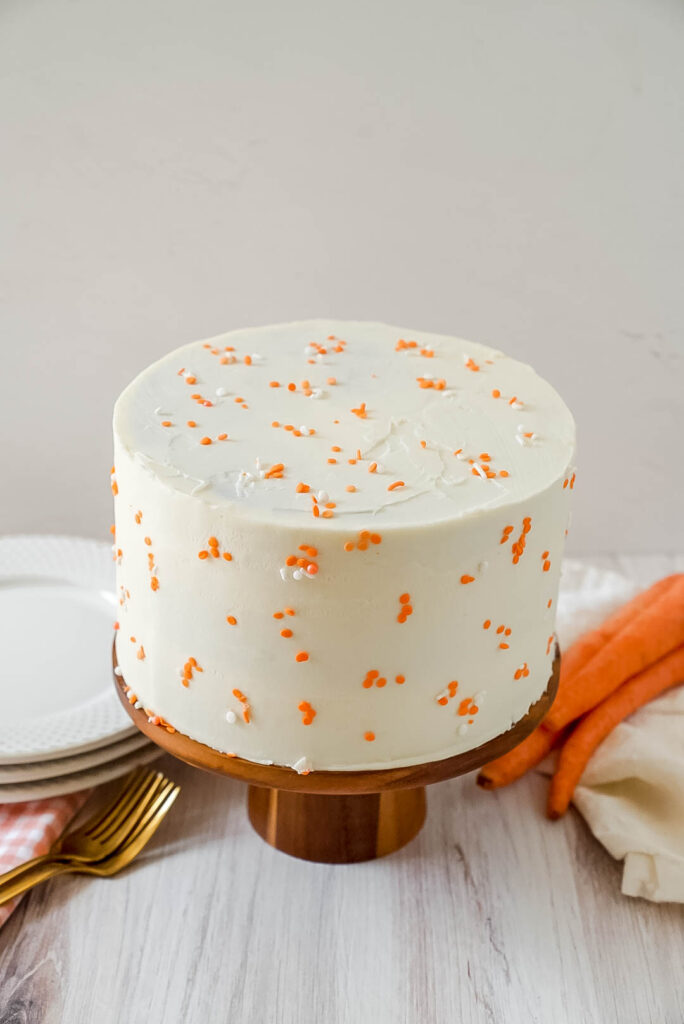
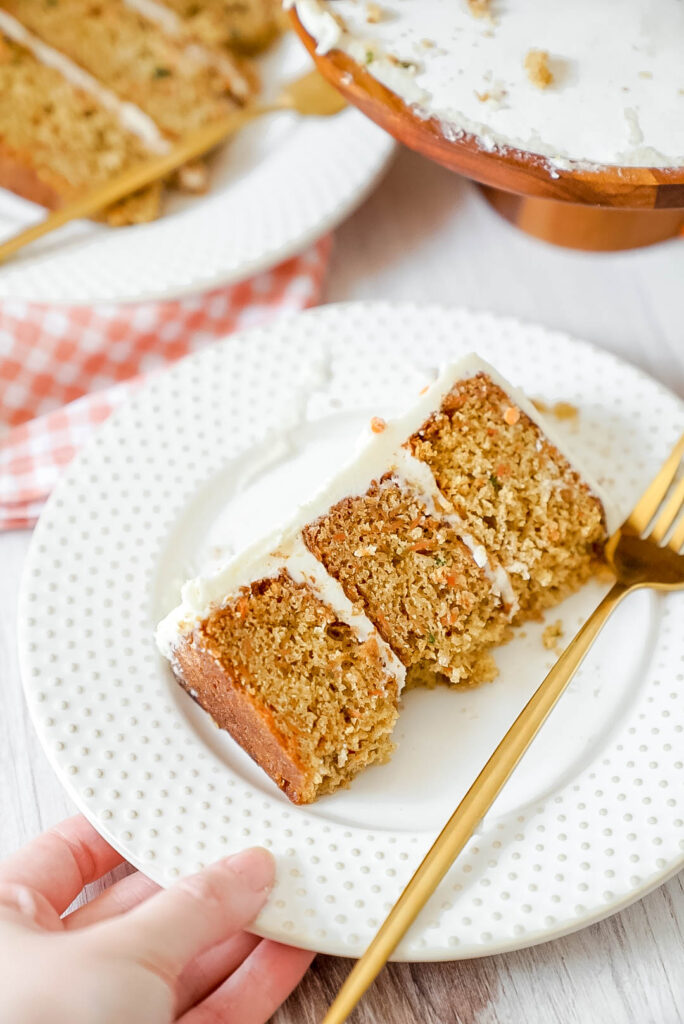
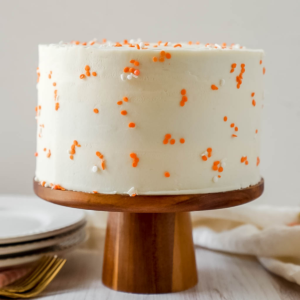
This tasty Brown Butter Carrot Cake has a great nutty flavor, but without the nuts. I love a delicious carrot cake, but they usually have nuts, and while I love a nutty flavor, I don't love nuts actually being in my desserts. So I created this carrot cake that is filled with spices and topped with a delicious cream cheese buttercream.

Best Easter Cake
This brown butter cake should definitely be on your Easter dinner menu this year. It's so simple and easy to whip up and will have your guest talking about it all night long. I actually wouldn't blame you if you ended up serving it before dinner! It's made with fresh carrots and filled with spices that will keep you coming back for more.
If you like this cake, you should try these other recipes:
Churro Bundt Cake, Coconut Key Lime Pie Cake, Lemon Blueberry Cake
How to brown the most perfect butter:
The brown butter in this recipe is what gives this cake a nutty flavor that will keep you coming back for more.
So what is browned butter? And how do you successfully brown it? Basically, you are burning the butter. But don't be alarmed, you don't want to really burn it and make it black, you just want to "toast" it until it turns brown. Browning the butter gives it a nutty aroma that adds to the great flavor of this dessert.
Why you need to make this recipe:
- Brown butter base-Since I don't think nuts belong in carrot cake, I decided to use a brown butter to help give it that nutty flavor without actually adding any nuts.
- Spiced-This cake has a bunch of different ground spices that just build flavor into the cake.
- Fresh grated carrot-Freshly grated carrots help make the carrot flavor organic and delicious as well as making the cake moist.
- Cream cheese buttercream-Need I say more? Okay I will. Cream cheese buttercream is just the best!
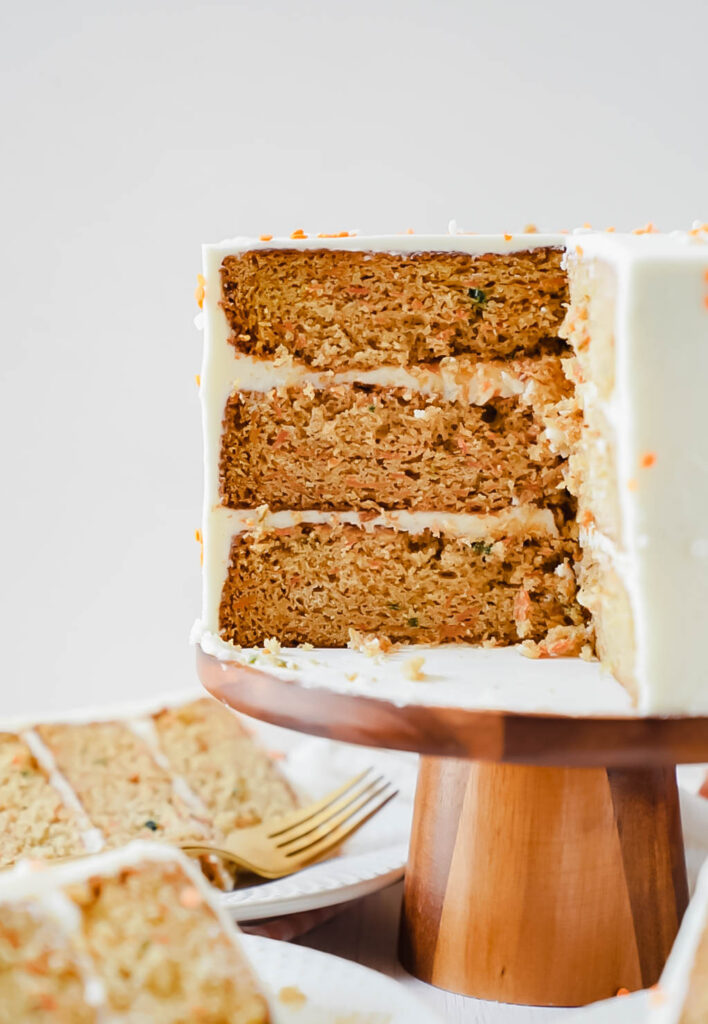
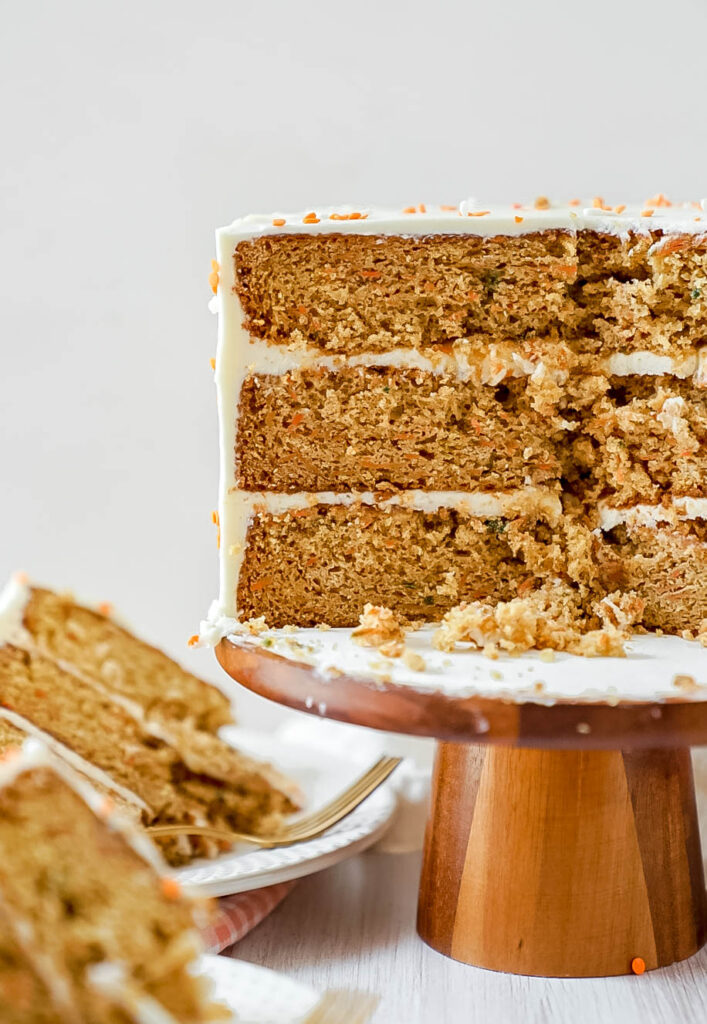
- Layered cake-Although this is a layered cake, you can make this into a sheet cake as well! Just follow the same process, but in a sheet pan.
Ingredients you will need
Here are notes, and a list all of all the ingredients you will need:
- Unsalted butter-You will need butter for the cake and for the buttercream. So make sure you have enough.
- Unsweetened applesauce-Make sure that it is unsweetened. Too much sugar will make your cake collapse.
- Large eggs-You will use 6 large eggs. Make sure to pull them out ahead so they come to room temperature.
- Vanilla extract-I use pure vanilla extract.
- Ground nutmeg, cloves, and ginger-Since fall is long behind us, check your spices to make sure you still have these on hand.
- Fresh carrots-Make sure you use fresh carrots. The pre-shredded ones just won't add the same moisture to your cake.
- Cream cheese-This is for the buttercream. You definitely don't want to leave this one out.
- Powdered sugar-Remember to always sift your powdered sugar so you have a smooth buttercream.
- Fresh baking soda/powder-Fresh baking powder and baking soda are vital to your baked goods. They are what make your cake rise. They expire every 6 months, but I change mine out every 30 days, just to be safe!
Substitutions
Although I don't recommend substitutions, if you are ever in a pinch, here are a few things you can substitute:
Vanilla extract-You can always use vanilla flavoring or imitation vanilla.
Vegetable oil-You can use another non flavored oil like canola oil.
Brown sugar-If you are low on light brown sugar, you can always use white granulated sugar.
Applesauce-You can use pineapple chunks instead of applesauce.
Step by step instructions
Here are instructions on how to make the cake and the buttercream.
STEP 1: Brown the butter-After you brown the butter, let it cool down to room temperature.
STEP 2: Grate the carrots-While the butter is cooling, start grating the fresh carrots.
STEP 3: Mix all the dry ingredients together-Mix all of the spices, flour, baking powder, baking soda, and salt together.
STEP 4: Beat the butter, sugars, and oil-Beat the butters, both sugars, and oil, for two minutes. Scrape down the sides and beat again.
STEP 5: Add the vanilla and applesauce-Mix both of them on low just until combined.
STEP 6: Add the eggs-Add eggs one at a time, beating after each addition. Scrape down the sides, and beat a little more.
STEP 7: Add the dry ingredients-Mix on low until there aren't any streaks of flour.
STEP 8: Fold in the grated carrots- To prevent over mixing, use a rubber spatula to fold in the grated carrots.
STEP 9: Bake the cakes-Bake the cakes for about 30-33 minutes.
STEP 10: Make the frosting- Make the frosting by beating all of the ingredients together.
STEP 11: Assemble the cake-Below are the steps that will help you assemble your cake.
ASSEMBLING THE CAKE
- Place a small amount of frosting on the center of a cake board. This will act like a glue to help you keep your cake on the cake board while you decorate.
- Make sure your layers are cold or frozen. This will help reduce crumbs and make it so the layers don't slide around.
- Make sure your cakes are level. Place the first cake layer on a cake board, bottom side down. Gently and evenly spread 1 cup of the cream cheese buttercream over the cake, making sure it's nice and level. If you really want to include nuts in your carrot cake, now is the time to add them (sprinkled over the buttercream layer).
- Place a second cake layer on top of the filling, bottom side up, and repeat steps 2 and 3. Place the final cake layer, bottom side up, on the second layer of filling.
- Crumb coat. This is SOOO important! A crumb coat locks those pesky crumbs in!
Storing your Brown Butter Carrot Cake
If I am dividing my brown butter cake making into multiple days, I bake my cake layers, cool them, and wrap them with plastic wrap and store them in the fridge or the freezer. This help reduce crumbs and makes it so the layers don't slide around when decorating. They can be stored in the fridge for 3-5 days.
FREEZING
If you want to make the entire cake ahead of time, you can freeze the decorated cake by simply chilling it and then wrapping it with plastic wrap. If you want to store it for longer than a few days, put a layer of aluminum foil over the plastic wrap. It can be stored like this in the freezer for up to 6 months. Once you are ready to serve the cake, pull it out of the freezer, and place it in the fridge to thaw to help decrease condensation.
If you need some other recipes to try, here are some:
Brown Butter Blueberry Cookies, Rocky Road Brownies, Banana Biscoff Cake
Recipe
Brown Butter Carrot Cake
Ingredients
For the carrot cake layers
- 1 cup browned butter cooled
- 2 Tablespoons vegetable oil
- ½ cup unsweetened applesauce
- 1 cup brown sugar packed
- 1 cup granulated sugar
- 6 eggs at room temperature
- 2 teaspoons vanilla extract
- 3 cups all purpose flour
- 2 teaspoons ground cinnamon
- ½ teaspoon ground nutmeg
- ¼ teaspoon ground ginger
- ¼ teaspoon ground cloves
- 1 Tablespoon baking powder
- 1 ½ teaspoons baking soda
- 1 teaspoon salt
- 4 cups freshly grated carrots (you need these to be fresh)
Cream Cheese Buttercream
- 1 ½ cups unsalted butter room temperature
- 8 ounces cream cheese room temperature
- 6 cups powdered sugar measured and then sifted
- ¼ cup heavy whipping cream
- 1 teaspoon pure vanilla extract
- pinch of salt
- This recipes makes enough to frost and fill a cake if you want to have some extra for piping on the top, i suggest making 1.5 recipe.
Instructions
For the cake
- Preheat oven to 350°F. Spray three 8 inch cake pans with non-stick baking spray. Line with parchment paper on the bottom and spray again. Set aside.
- In a medium sized sauce pan, melt the butter on medium heat. Keep stirring the butter until it starts to foam and the milk deposits on the bottom separate. Stir until the butter starts to brown and you hear crackling noises. Take off heat. Pour in a glass bowl. Let it cool for 10-15 minutes.
- While the butter is cooling, grate the carrots into a large bowl. After you are done, set them aside.
- In a medium sized mixing bowl, whisk the flour, spices, baking powder, baking soda and salt. Whisk to combine. Set aside.
- In the bowl of stand mixer, beat the brown butter, oil, applesauce, and both sugars on medium high for about 3 minutes. The mixture should look lighter in color once it is beaten.
- With the mixer on medium speed, add the eggs, one at a time, making sure to scrape down the sides and bottom of the bowl between additions. Once all of the eggs are combined, beat the mixture for about a minute on medium speed. Add the vanilla and mix on low.
- With the mixer on low, gradually add the flour mixture. With a rubber spatula, fold in the carrots.
- Evenly divide the cake batter between the three prepared pans (about 20 ounces of batter in each). Bake for 30-33 minutes, or until a toothpick inserted in the center comes out with only a few moist crumbs on it. Don't over bake.
- Let the cake layers cool in the pans on cooling racks for about 10 to 15 minutes. Transfer the cake layers out of the cake pan and onto the cooling racks to cool completely.
- After the cakes have cooled, level the cakes, if needed. If you are not using them right away, wrap them in plastic wrap and freeze. If you are using them within 1-2 days of baking, wrap them in plastic wrap and place them in the fridge.
For the cream cheese buttercream
- In the bowl of an electric mixer, combine the butter and cream cheese. Beat on medium speed for about two minutes. Scrape down the sides and bottom of the bowl. Beat again for 2 more minutes.
- With the mixer on low speed, add the powdered sugar, followed by the cream, vanilla, and a pinch of salt. Beat on low just until mixed. With a rubber spatula, scrape down the sides of the bowl.
- Turn the mixer up to medium-high speed and beat for about 3 to 5 minutes.
- With a rubber spatula or a wooden spoon, beat out all of the air pockets by hand for a smooth look.
Assembly
- Pipe a small dollop of buttercream onto the middle of a cake board. Place the first cake layer, top side up.
- Evenly spread about 1 cup of the cream cheese buttercream onto the cake layer. Place the second cake layer top side down onto the buttercream and spread another 1 cup of buttercream over the second layer.
- Place the third cake layer top side down.
- Apply a thin layer of buttercream over the entire cake. This is called the crumb coat. Freeze the crumb coated cake for about 15 minutes to set the crumb coat.
- Once the crumb coat is set, finish frosting the cake with the remaining buttercream.
- this cake is best served at room temperature.
Leave a Reply